|
As described on the Cygwin wiki page,
Cygwin is free. It's a Unix-like environment and command-line interface for Microsoft Windows.
What's most important about Cygwin is that it comes with an X11 server which
will allow you to run an X11-based application via ssh on a remote machine with a graphical user interface
that can be displayed on your laptop.
To install and set up Cygwin, there are basically 3 steps:
There are two ways to do this. The quick way (and the recommended way) is to download a ZIP file I created which contains all the downloaded Cygwin setup file from
the official Cygwin webite as of 10/9/2024. Of course, this set up may be out-dated by now.
All the instructions below assumes that you start with my ZIP file.
Another way is to Download Cygwin From Scratch, which can take over an hour to just download all the files and I do not recommend this approach.
If you are okay with running a pre-downloaded 10/9/2024 version of Cygwin (which should work just fine), then please download "Cygwin-Setup-9Oct2024.zip" from either of the following two places:
Now that you have Cygwin downloaded into the Cygwin-Setup folder on your desktop.
The next step is to install it.
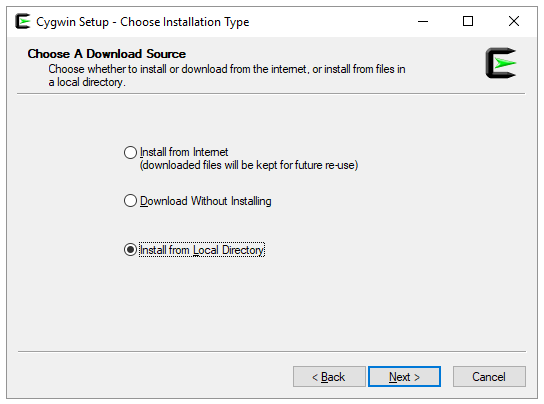
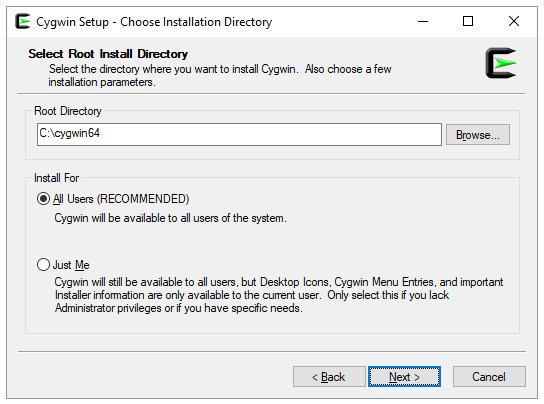
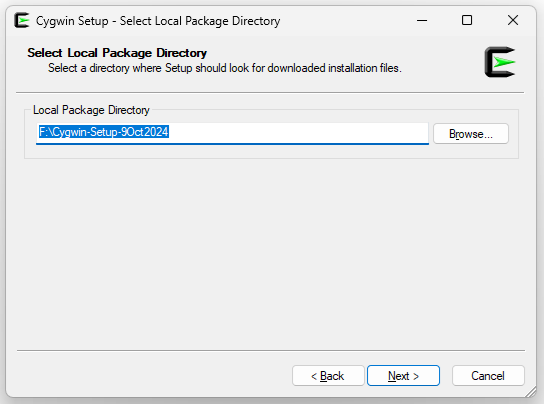
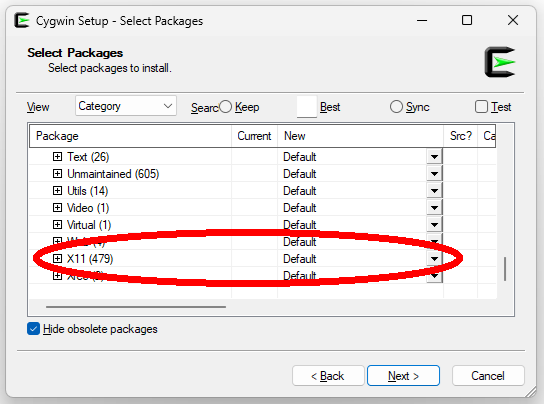
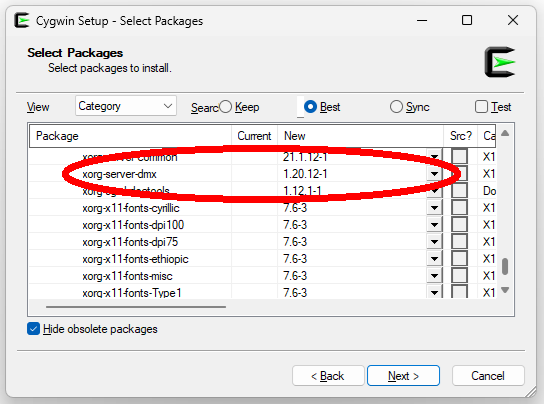
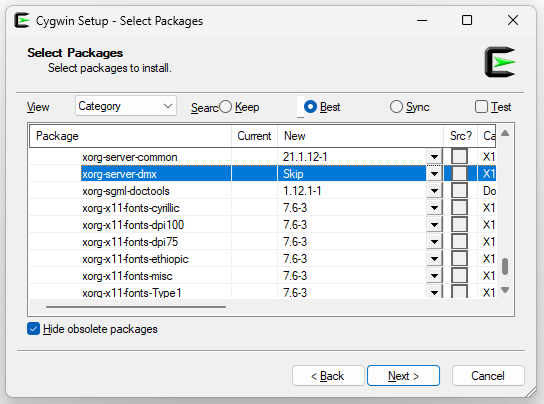
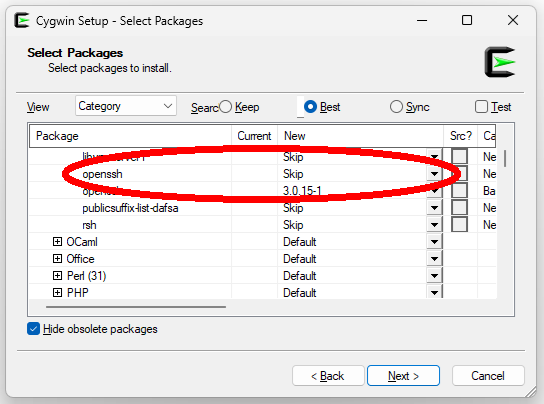
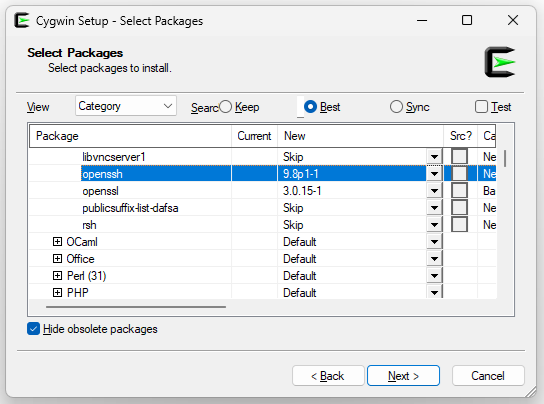
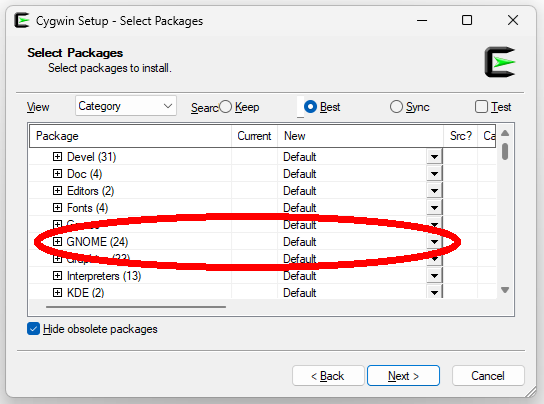
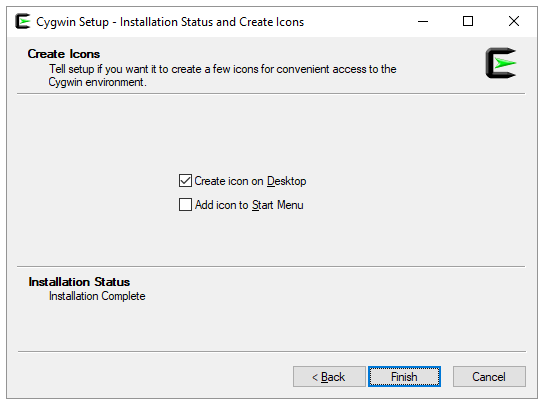
Go to your Desktop, click open the Cygwin-Setup folder and click on setup-x86_64.exe. Click on the Next button in the Cygwin Setup window. Click on the "Install from Local Directory" radio-button and your screen should look like the following: Click on the Next button to proceed with installation. You will see a screen that looks like the following: You can change the installation directory if you'd like. We will keep the default and install Cygwin into your C: drive. Click on the Next button to proceed. You will be asked to select a local package directory and the screen would look like the following: Click on the Browse button and navigate to your Desktop directory and select the Cygwin-Setup directory and click on the Ok button. Click on the Next button to proceed. If you get a popup messagebox saying that setup.ini is older than the one you used last time, just click on Yes to proceed. Now your screen would look like the following: Make sure that View is showing the Category selection. If not, click on the drop-down list and select Category. Now you need to select what packages to install. Click on the "+" symbol to the left of All to see all the categories then scroll all the way to the bottom and you should see something like the following: Click on the down arrow on the right and select Install to install packages in the X11 package. Your screen should look like the following: Click on the "+" symbol to the left of X11 to see all the packages under the X11 categories and scroll all the way to the bottom then press the PgUp key on your keyboard 3 times and your screen should look like the following: Click on the down arrow to the right of xorg-server-dmx package and select Skip to skip the installation of the xorg-server-dmx package. Your screen should look like the following: Next thing to do is to install the openssh package. Scroll all the way up to the top and press the PgDn key on your keyboard 2 times and your screen should look like the following: Looks for the Net category and click on the "+" symbol to the left of Net. Then scroll down to look for the openssh package and your screen should look like the following: Right now, it's showing the openssh package will be skipped and we need to get it installed. Click on the down arrow on the right and select the latest version of the package and your screen should look like the following (the version number you get may be different from what's shown in the image): Finally, we need to install 3 packages from the GNOME category. Scroll all the way up to the top and press the PgDn key on your keyboard once and your screen should look like the following: Looks for the GNOME category and click on the "+" symbol to the left of GNOME. Then scroll down to look for the following three packages: alacarte, gnome-ssh-askpass, and gnome-terminal. For each of these three packages, click on the down arrow on the right and select the latest version of the package. Now you are ready to install all the selected package. Click on the Next button on the bottom. You may see a lot of warning messages on the next screen. The Accept default problem solutions checkbox should be checked and you should just click on the Next button. The next screen is the confirmation screen. Just click on the Next button to proceed. The installation process can take a while (may be up to 30 minutes). The last step can take some time and it would look like nothing is going on. Just be patient. When installation is about to finish, you may get a screen saying that you have "Postinstall script errors". Please read what's in the window. If it says that these do not necessarily mean that it will cause packages to fail, then it's okay to proceed. If there are more serious errors, you may have to reinstall everything since some important packages may be broken. You can definitely ignore error messages related to "dbug.sh". When installation is done, you will see the following screen: You should check both checkboxes and then click on the Finish button to close Cygwin Setup and proceed to Set Up Cygwin.
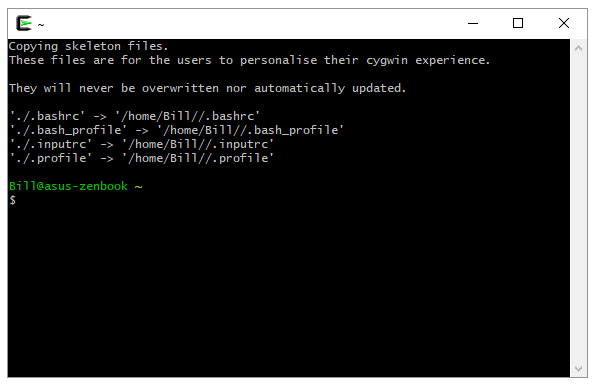
After installation has completed, you should have a new icon, labeled "Cygwin64 Terminal", on your desktop.
If you double-click on it, the Cygwin Terminal program will run and you will see something like the following
(your user namd and directory name will most likely be different):
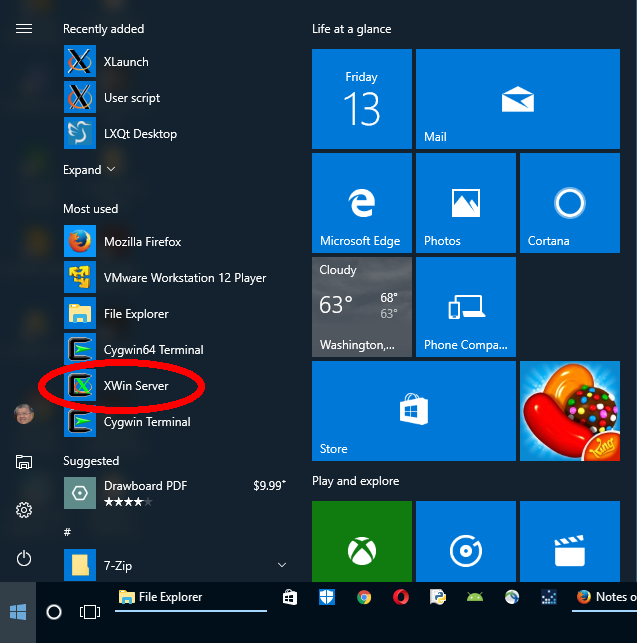
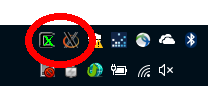
You also need to start the X11 server if you need to ssh to another machine and be able to run programs that have a graphical user interface. All you need to do is to click on your Windows' Start Menu, scroll down to the C section and look for Cygwin-X folder, click on it, and look for the "XWin Server" icon. It may look something like the following: Drag the "XWin Server" icon onto your desktop and you are all set! If you cannot find the "XWin Server" icon in the Start Menu, look for it in The "ProgramData\Microsoft\Windows\Start Menu\Programs\Cygwin-X" folder in your C: drive and copy "XWin Server" to your desktop. Another way is to click on Windows' Search and enter "XWin". When you see the "XWin Server App', right-click on it and select Pin To Taskbar. This way, you can easily find the XWin Server icon in the taakbar. To start the X11 server, just click on the "XWin Server" icon on your desktop or in your taskbar. (If you are running Windows 10/11 Professional, you should right-click on the "XWin Server" icon and select "Run As Administrator", if you know the admin password. You should do it this way every time you want to start the X11 server.) In a few seconds, you should get a couple of icons in your system tray that looks like the following: The left icon (with a green X) is the "X Applications Menu" and the right icon (with a black X) is the "Cygwin/X Server". If you click on the "X Applications Menu" and click on the "System Tools" submenu, you can see that there are a bunch of terminals available to you. Selecting the "Cygwin Terminal" there is the same as running the "Cygwin64 Terminal" on your desktop. One down side of the "Cygwin64 Terminal" is that it's not a tabbed terminal program. If you would prefer to use a tabbed terminal, you can run the "gnome-terminal" program. You can run "gnome-terminal.exe" from the "Cygwin64 Terminal", but that's kind of inconvenient. Here's what you can to to be able to launch "gnome-terminal" from the "X Applications Menu". Click on the "X Applications Menu" and click on the "Preferences" submenu and select "Main Menu". This allows you to edit the "X Applications Menu". Click on System Tools in the left panel and let's change the last menu item to run "gnome-terminal". The last menu item is "xterm". Click on it and then click on the Properties button. Change Name to "Gnome Terminal", change Command to "gnome-terminal", and change Comment to "Gnome Terminal". Click on the OK button to save changes. With the "Gnome Terminal" selected, you can click on the Move Down button to move it all the way down to the bottom of the System Tools menu. Click on the Close button to save everything. From now on, if you need to run a "terminal" program, you just need to click on the "X Applications Menu" in the system tray, then click on the "System Tools" menu, and then click on "Gnome Terminal" to run the "gnome-terminal" program. You will also get a little icon at the top of your screen. That program is called "trayer" and it's showing what kind of keyboard layout you have. If you want to get rid of it, you can open a terminal program and open a text editor (such as "nano") to edit the "/etc/X11/xinit/startxwinrc" file and replace "trayer" with a non-existant file name (such as "_x_trayer_x_"). If you cannot save the updated "/etc/X11/xinit/startxwinrc" file due to permissions problem, you should do:
cp /etc/X11/xinit/startxwinrc ~/.startxwinrc
and edit "~/.startxwinrc" and make the same change.
Finally, to shutdown your X server, you can click on the "X Applications Menu" and click on "XDG Menu" and select "Exit". |