|
The first thing you need to do is to download an ISO file for a 32-bit Ubuntu 16.04.
Since Ubuntu 16.04 is not the current release of Ubuntu,
if you just go to the Ubuntu web site,
you will be downloading the WRONG version of Ubuntu. Also, it's best not to install Ubuntu 16.04 from scratch.
It's better to install from a virtual appliance. But if you would prefer to install a 32-bit Ubuntu 16.04from scratch, please follow the instructions on this page.
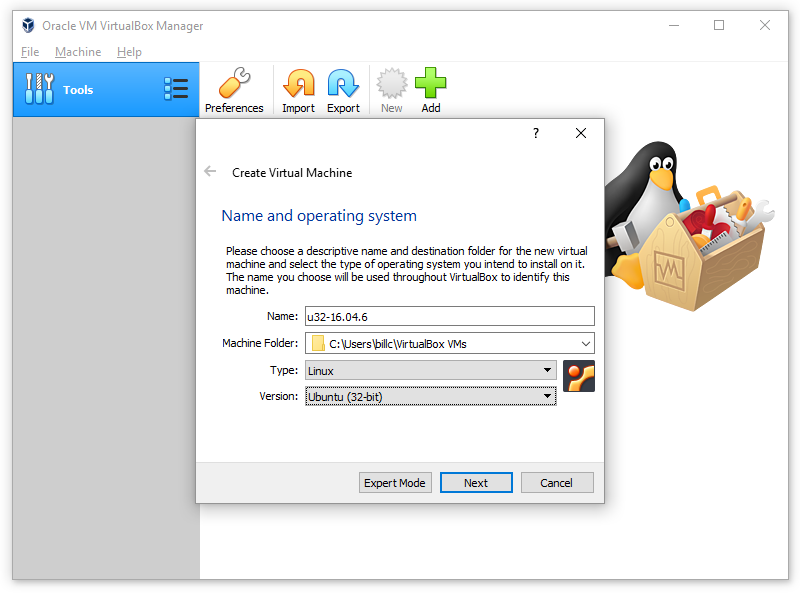
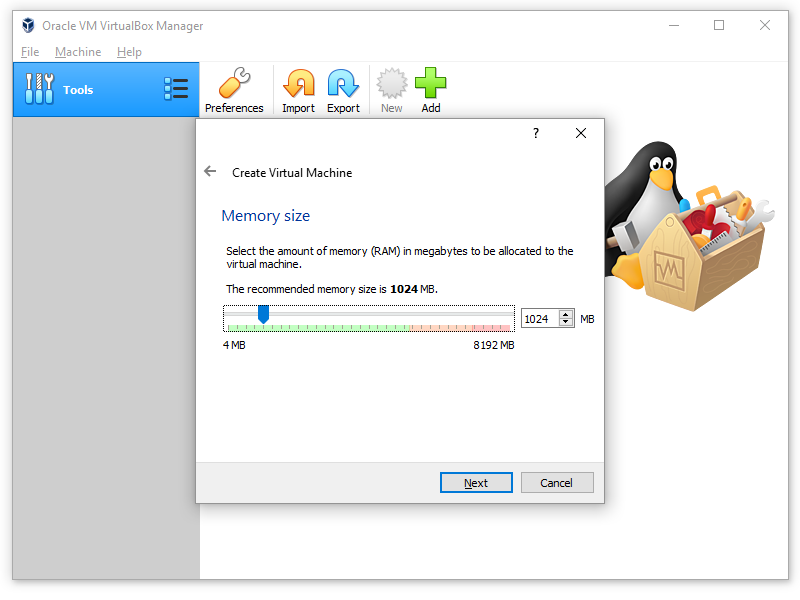
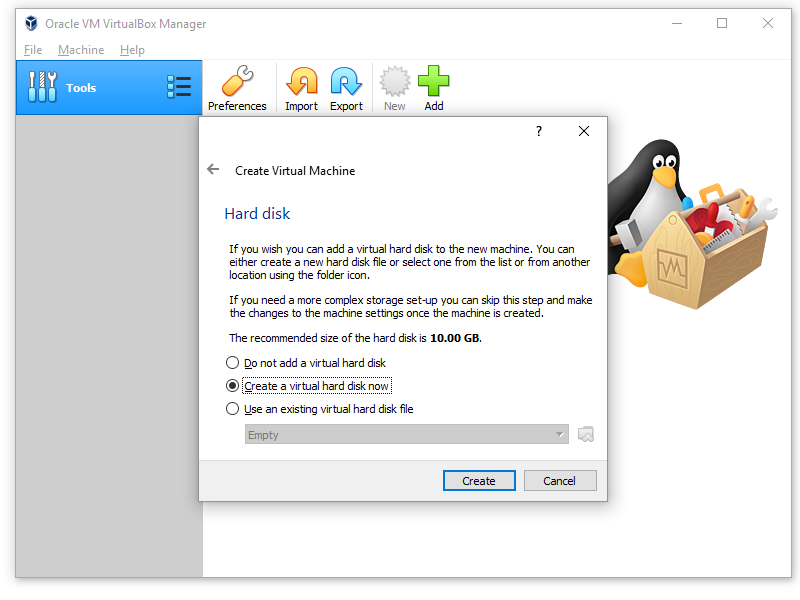
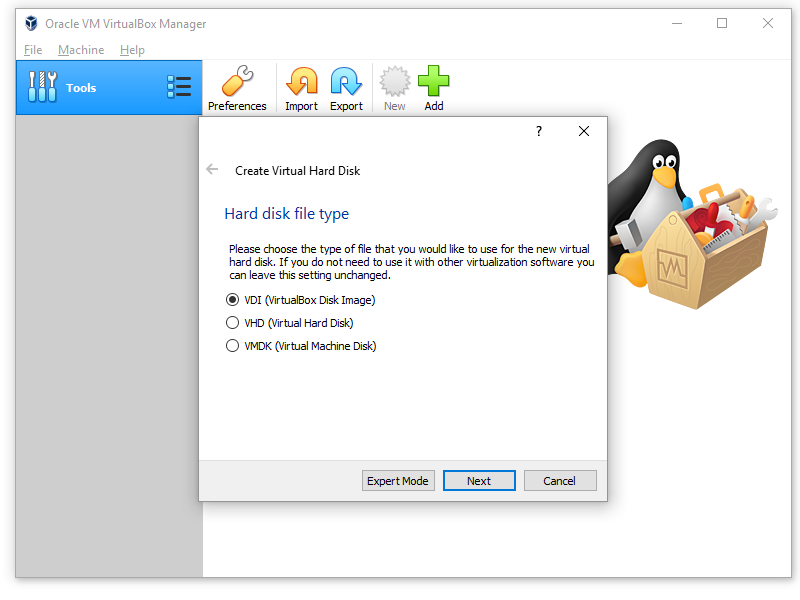
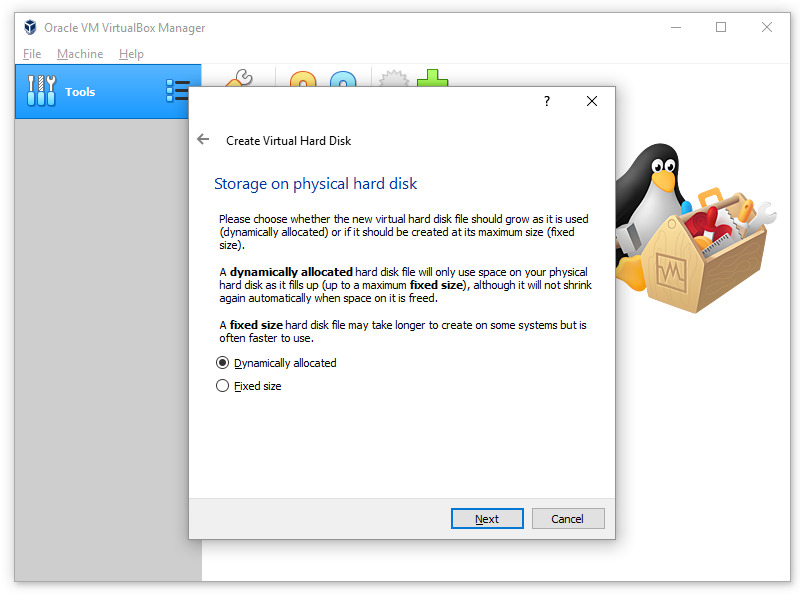
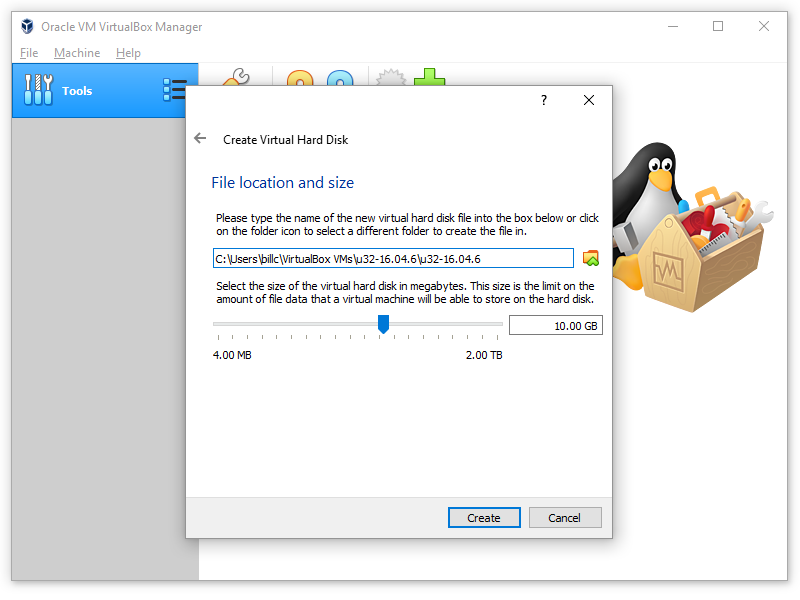
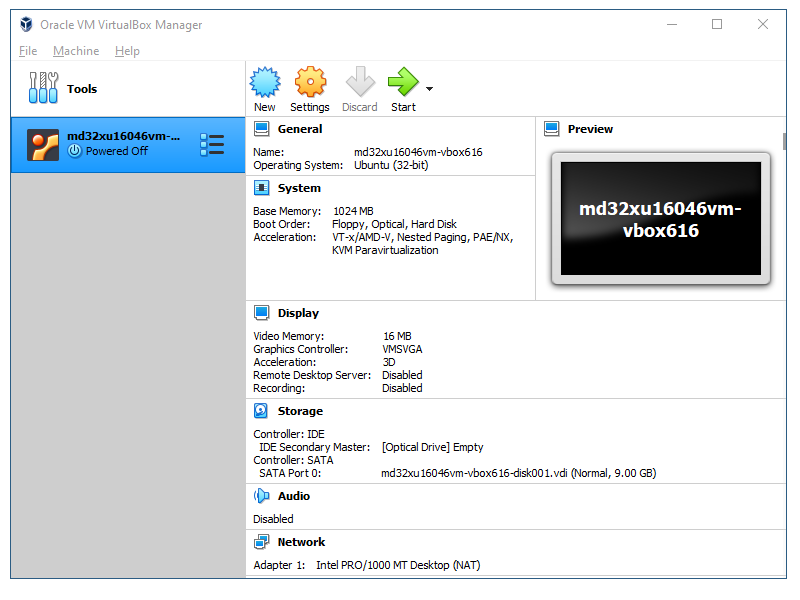
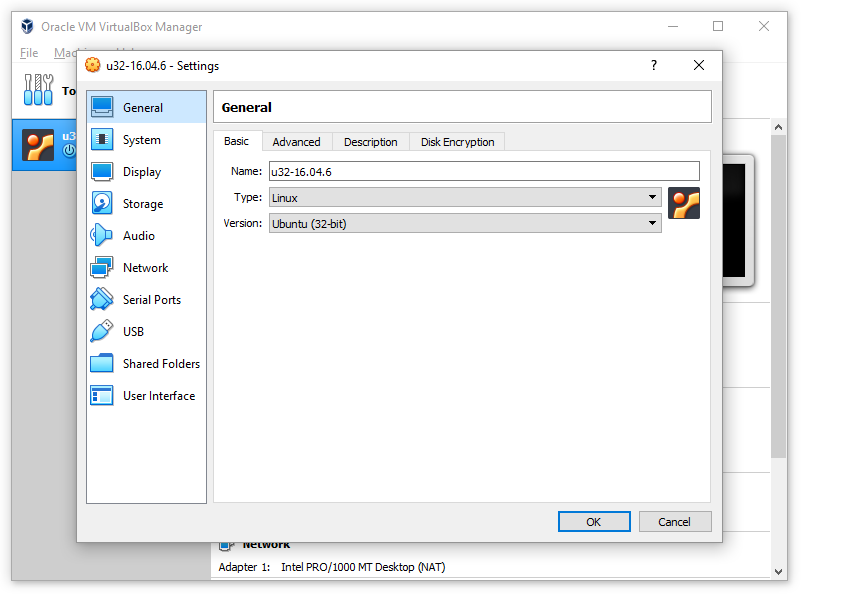
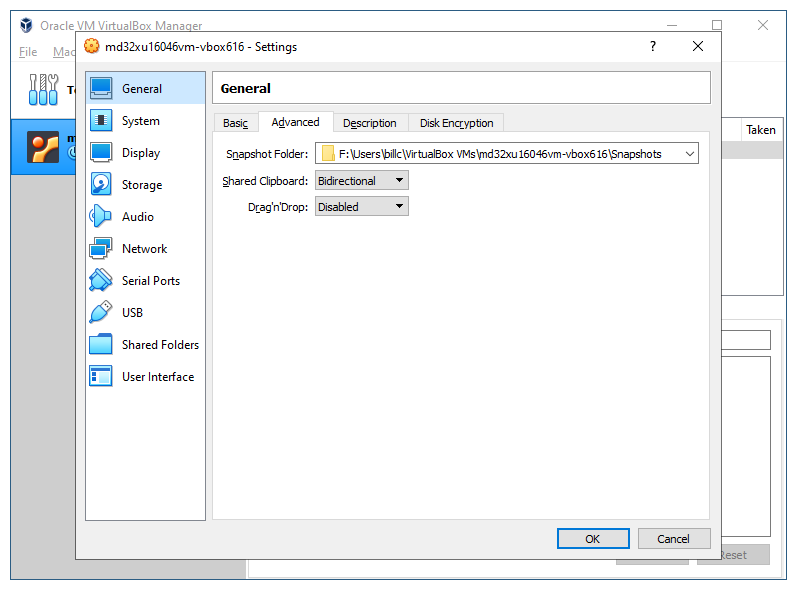
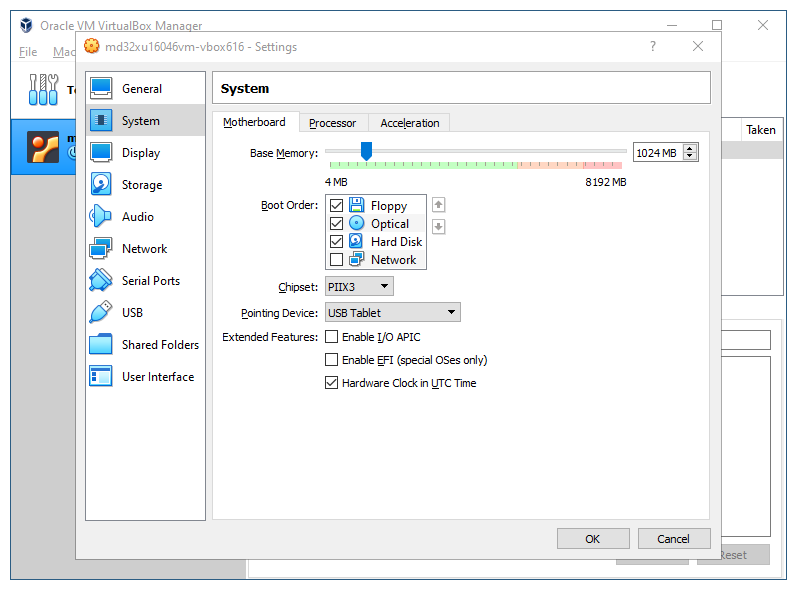
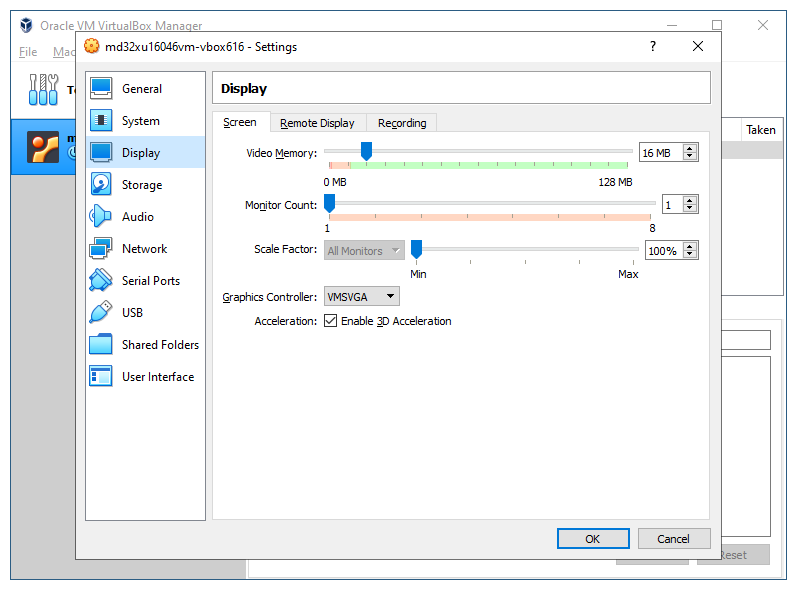
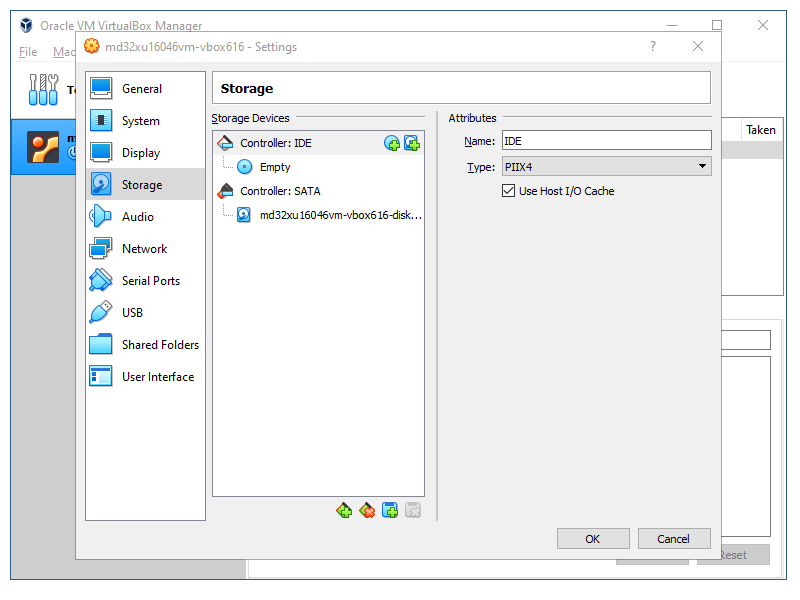
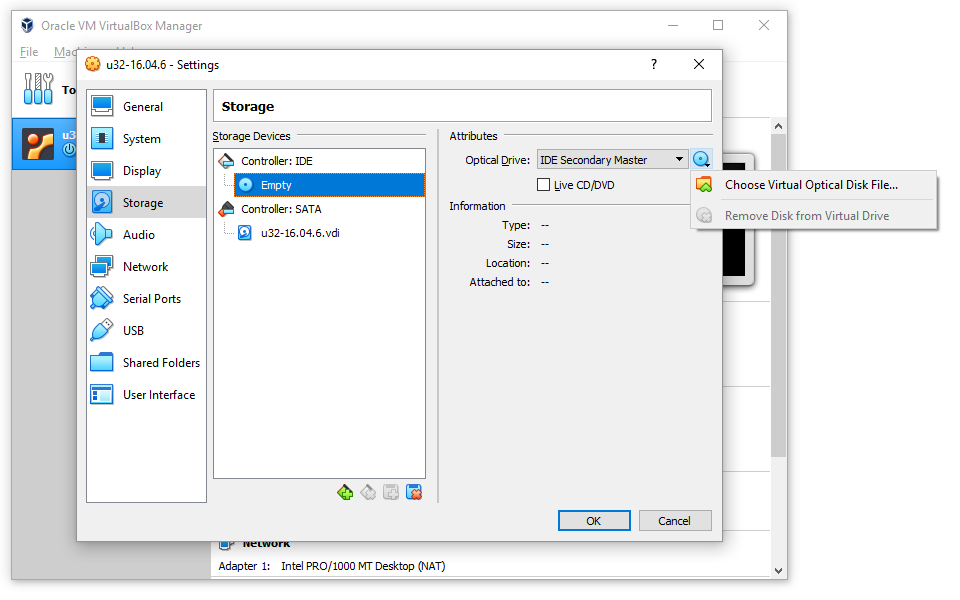
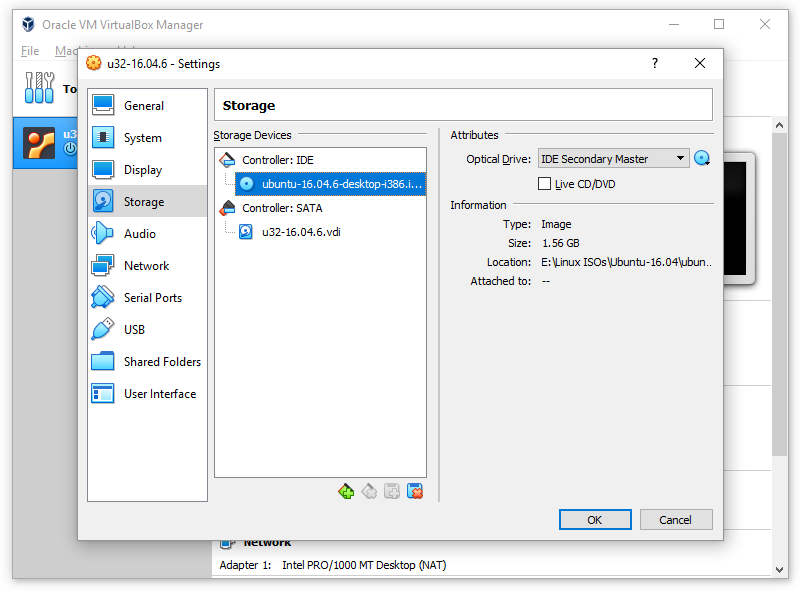
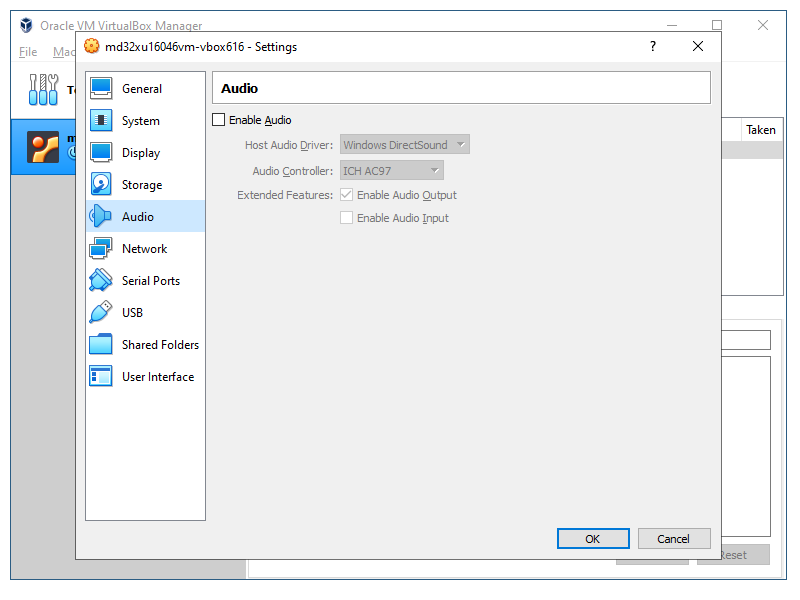
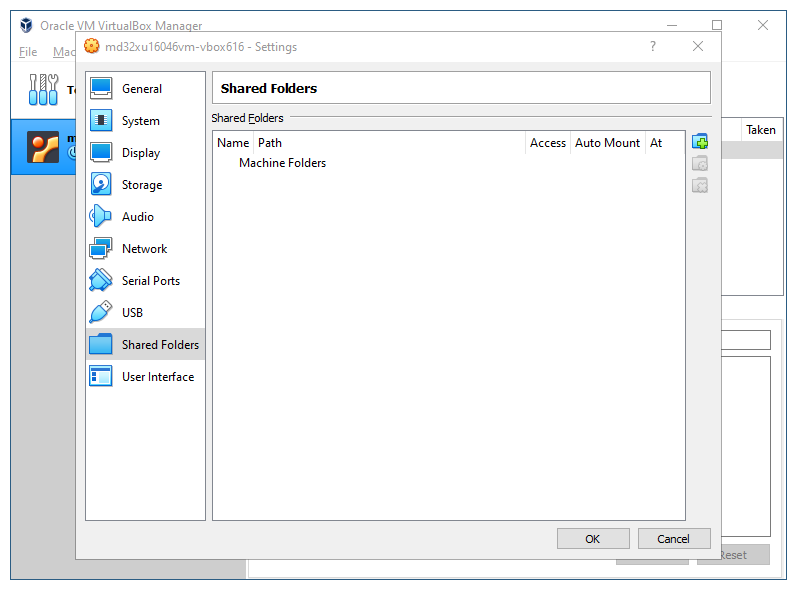
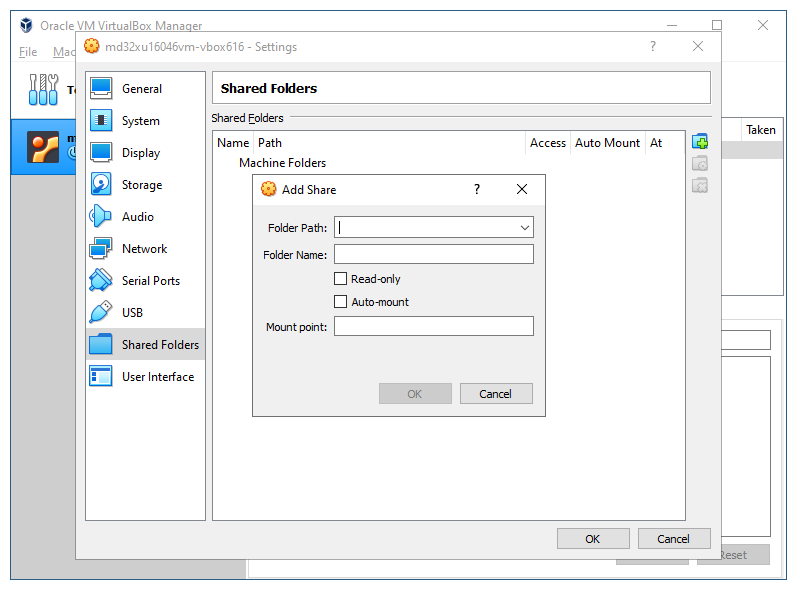
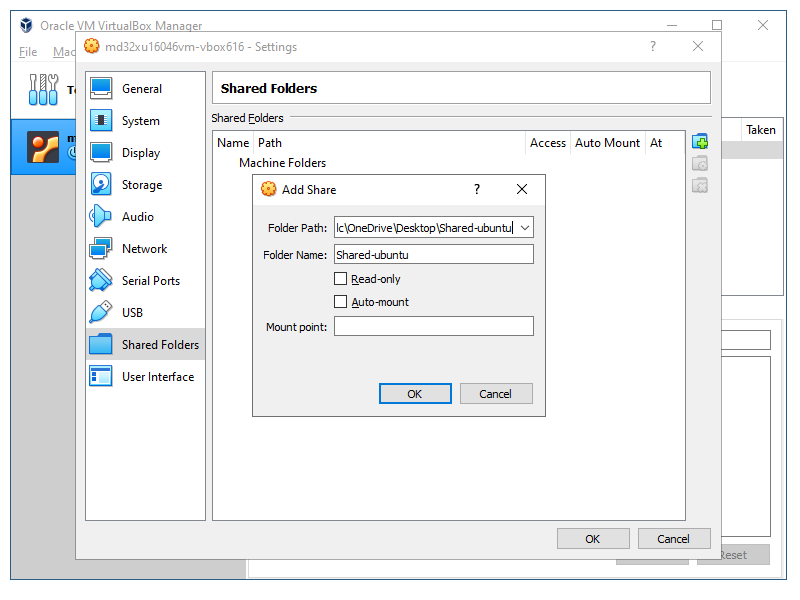
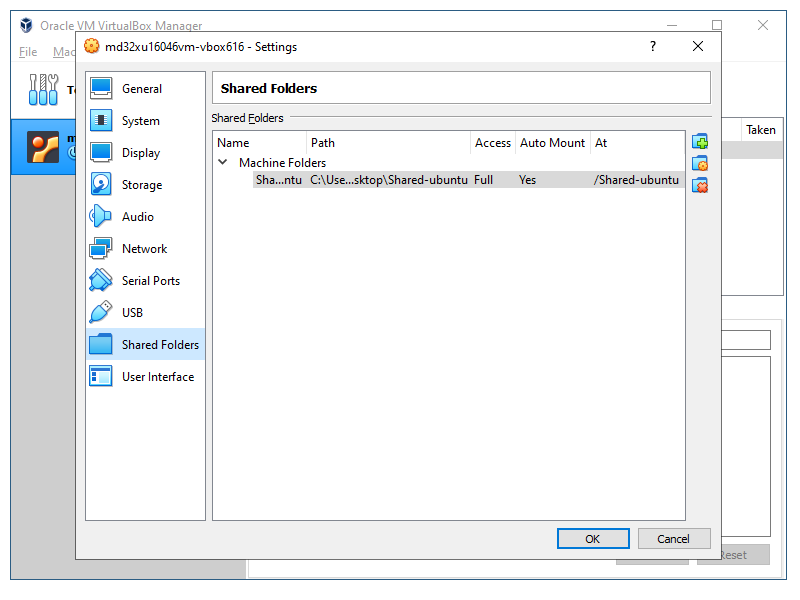
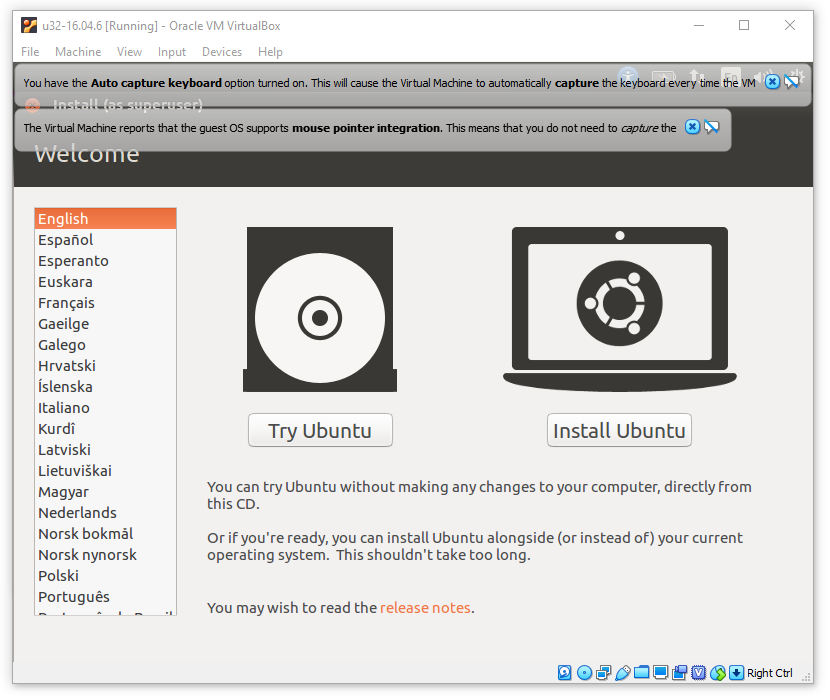
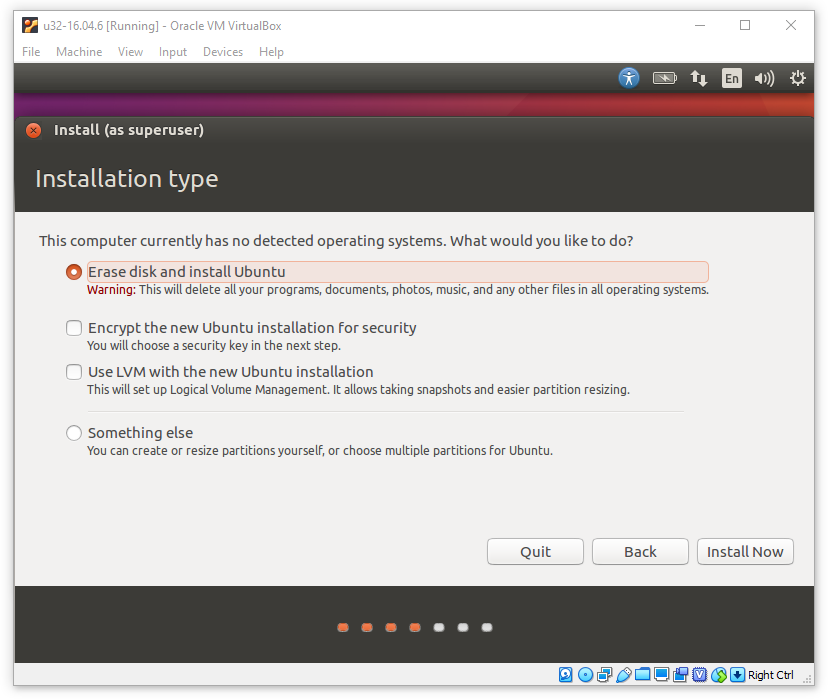
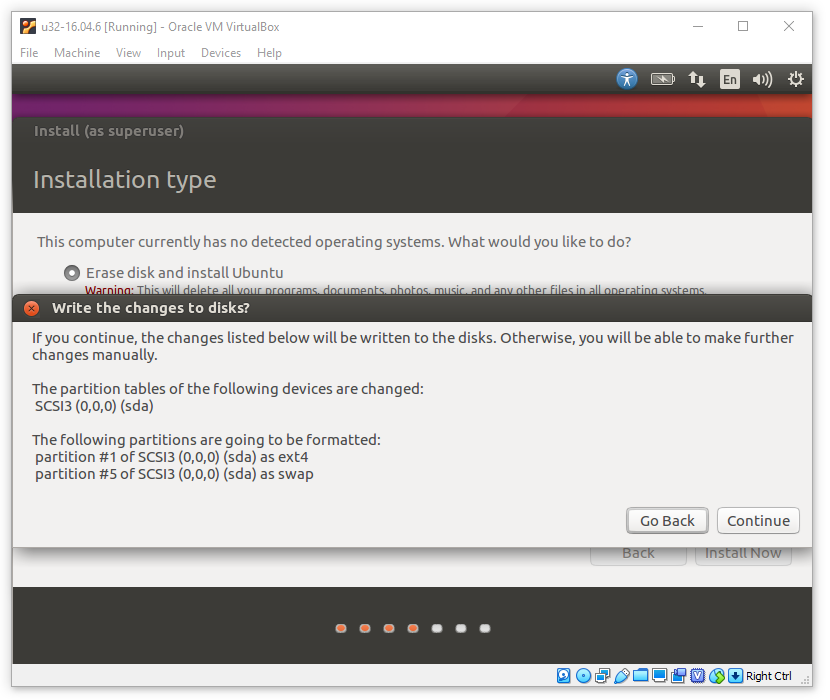
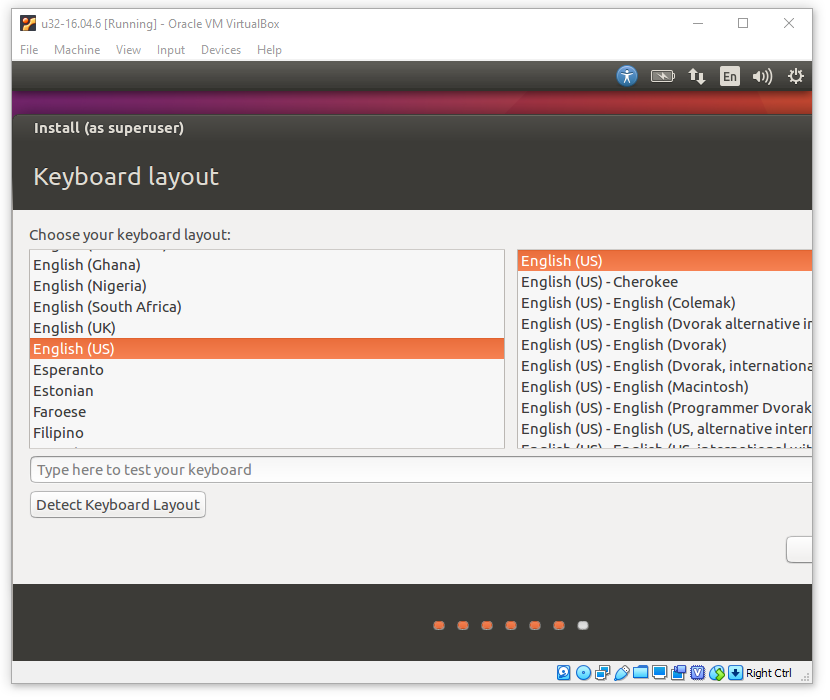
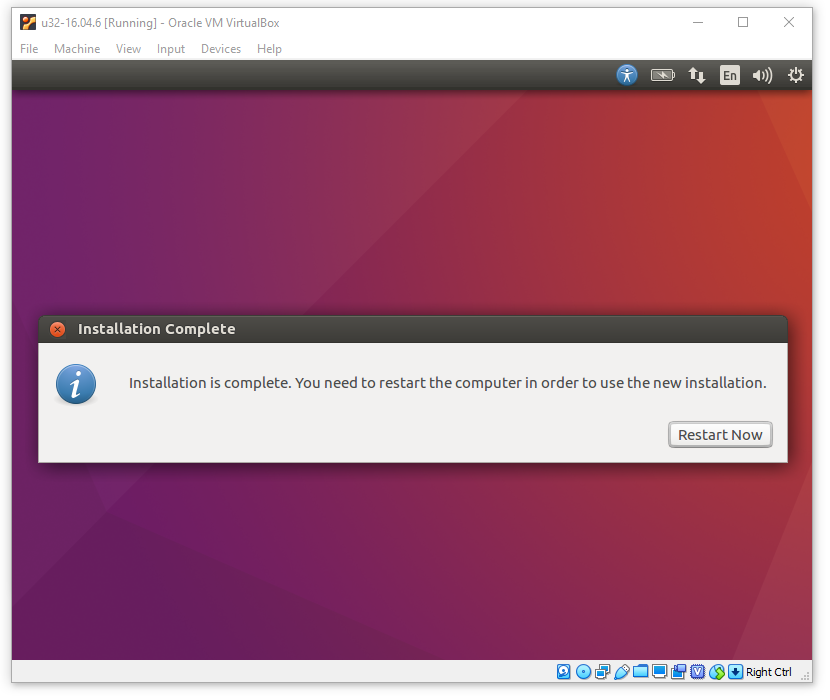
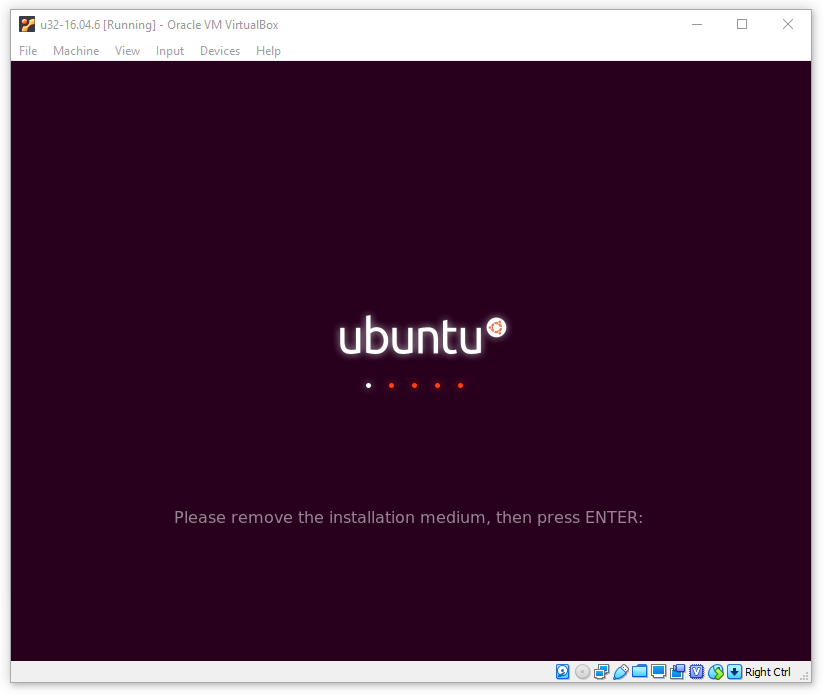
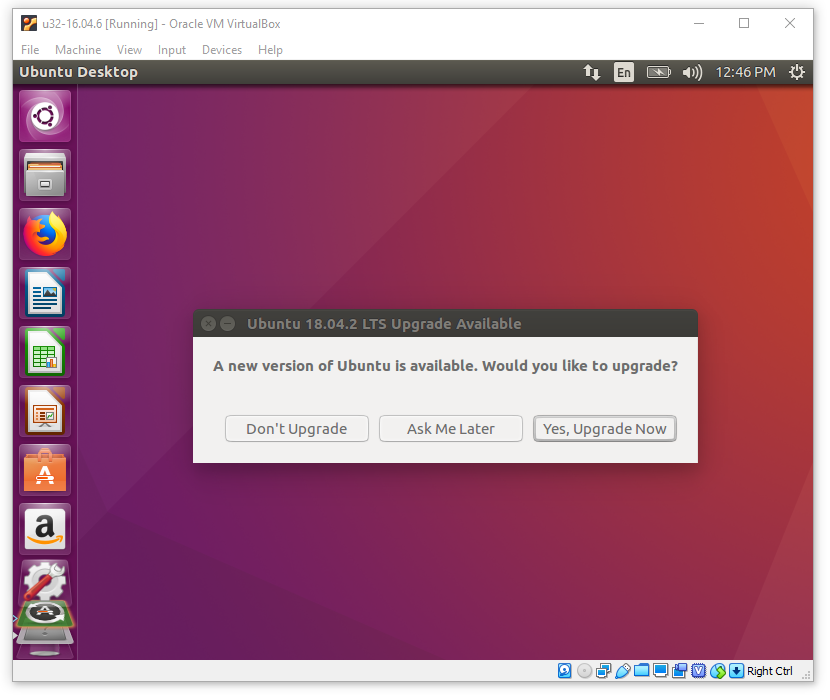
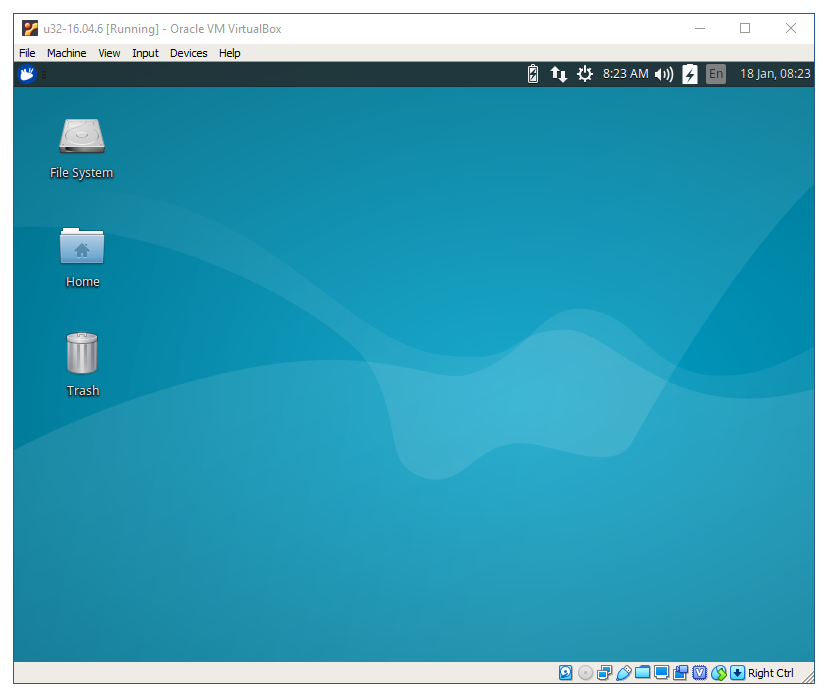
To download the right 32-bit Ubuntu 16.04, you need to go to the Ubuntu 16.04 (Xenial Xerus) web site and download the desktop release of Ubuntu 16.04. We strongly encourage you to use the 32-bit Ubuntu 16.04 since all examples used in class will assume that your CPU is a 32-bit CPU. At the time of this writing, the file you should be downloading is "ubuntu-16.04.7-desktop-i386.iso". We will use this file name here. The important part of the file name is "16.04". The number after "16.04" is a release number and anything ≥ 4 would be fine. Please replaces all references to "ubuntu-16.04.7-desktop-i386.iso" with the file name of the ".iso" file you actually downloaded. If download is slow from Ubuntu, please try this link (from a server at USC). Follow the instruction to download and install VirtualBox. Then launch VirtualBox and you will get a screen that looks like the following: If you click on About VirtualBox under the Help Menu, you will see the version of the VirtualBox you are running. The screenshots below are from a mix of VirtualBox-6.0.8 and VirtualBox-6.1.6. If you are using a newer version of VirtualBox, your screens may look different and some of the default values may be different. Step 1: Create An Empty Virtual MachineTo install Ubuntu 16.04 into VirtualBox, first you need to create an empty virtual machine. Start with the above screen, if you click on the New button in the left-top corner and you should see the following screen:Enter "u32-16.04.7" in the Name textbox (to mean "ubuntu", "32-bit", "version 16.04", and "release 6"). (Please ignore my typo! Instead of "u32", I have "u34" in all the screenshots! Also, if you are installing version 16.04.7, you should name it "u32-16.04.7".) Select "Linux" as Type and select "Ubuntu (32-bit)" as Version, then click on the Next button. You should then see the following screen: The default memory size is shown as 1GB (it may be different for a different version of VirtualBox) and 1GB is plenty if you just want to do your programming assignments! You should run as few applications inside your 32-bit Ubuntu 16.04 as possible and only use it to do your programming assignments. If you want to play around with Ubuntu 16.04, you can install another virtual machine. But you should keep this virtual machine lean and clean! You should definitely try to avoid running things like a web browser or a music player in this virtual machine. By the way, this value can be changed easily after everything is installed. So, just set it to 1GB for now and it would be fine. If you have to run a web browser inside this virtual machine and you have 8GB or more memory in your host machine (Windows 10 or Mac OS X), you should increase the memory for this virtual machine to 2BG. (A web browser is a memory hog!) Please do NOT set the memory size to anything more than 2GB because the more memory you give to Ubuntu 16.04, the less memory the rest of your machine has. In general, you should run memory intensive applications inside your host machine and not inside a virtual machine. If your host machine has only 4GB memory, the maximum memory I would give to the virtual machine would be 1.5GB (and you will only have 2.5GB to run everything else in your host machine). After you set your memory size and click on the Next button, you should see the following screen: Don't change a thing and click on the Create button, you should see the following screen: Don't change a thing and click on the Next button, you should see the following screen: Don't change a thing and click on the Next button, you should see the following screen: Since the goal here is to work on your programming assignments, at least 10GB of disk space is required. If it's showing something smaller than 10GB, please change it to 10GB. Then click on the Create button, you should see the following screen: In the above screenshot, it's showing that the name of the virtual machine is "awsvnc32xu16047-vbox6140-f1", and that's because I'm using the same screenshot for both installing a pre-canned 32-bit Ubuntu 16.04 system and installing a 32-bit Ubuntu 16.04 system from scratch. If you got here by following the instructions above, the name of your virtual machine should be "u32-16.04.7". Step 2: Setup The Virtual MachinePlease note that in all the screenshots below, some will be showing the name of the virtual machine as "awsvnc32xu16047-vbox6140-f1" and some will be showing the name of the virtual machine as "u32-16.04.7". This is because I'm using the same screenshot for both installing a pre-canned 32-bit Ubuntu 16.04 system and installing a 32-bit Ubuntu 16.04 system from scratch.Starting with the above screen, if you click on the Settings button (orange color) near the middle-top part of the window and you should see the following screen: You can see that General is selected on the left and the Basic tab is selected in the right pane. We should see that under the Basic tab, we are setting up the virtual machine that we set out to build (Name being "u32-16.04.7"), Type being "Linux", and Version "Ubuntu (32-bit)"). If your Version is "Ubuntu (64-bit)", please change it to "Ubuntu (32-bit)". Select the Advanced tab and you should see the following screen: Change the Shared Clipboard from "Disabled" to "Bidirectional" so that you can use the clipboard to copy from something running in the host and paste into something running inside the virtual machine or copy from something running inside the virthal machine and paste into something running in the host. Click on System on the left and you should see the following screen: If you have an older machine, you don't need to change anything here. But if your machine is relative new, you should check the Enable I/O APIC checkbox and click on the Processor tab and increase the number of CPUs from 1 to 2. You should keep the amount of RAM (referred to as "Base Memory" above) unchanged for now. If you later decide that you need more RAM for your virtual machine, you can come back here. Click on Display on the left and you should see the following screen: You should see that the "Enable 3D Acceleration" checkbox is not checked. Click on it to enable 3D acceleration. If you don't check this checkbox, your Ubuntu 16.04 will run very slowly. IMPORTANT for Mac OS X: If your host is Mac OS X, especially for the new Mac models, you should set Video Memory to 128 MB. Click on Storage on the left and you should see the following screen: In the middle of the screen, inside a box that says "Storage Devices", there is a line that says "Controller: IDE". Right below it, it shows an icon of an optical disk with the word "Empty" right next to it. Click on the optical disk icon or "Empty" and you should see the following screen: In the right column, for "Optional Drive", it's showing "IDE Secondary Master". There is another icon (blue color) of an optical disk immediately to the right of it. Click on that icon (and not the "IDE Scondary Master") and you should get a popup menu that looks like the following: Click on "Choose Virtual Optical Disk File" and navigate to the directory where you have downloaded the "ubuntu-16.04.7-desktop-i386.iso" file. Select the "ubuntu-16.04.7-desktop-i386.iso" file and you should see the following screen: Notice that in the middle of the screen and right below "Controller: IDE", the previously "Empty" optical disk now becomes "ubuntu-16.04.7-desktop-i386.iso". (The "i386" in "ubuntu-16.04.7-desktop-i386.iso" means that it's a 32-bit system. If you see "amd64" and not "i386", please download and select "ubuntu-16.04.7-desktop-i386.iso" instead.) Click on Audio on the left and you should see the following screen: By default, the "Enable Audio" checkbox at the top is checked. On some systems, this can cause your CPU usage to go to 100% and your system may crash or become very very slow. Therefore, it's a good idea to uncheck the "Enable Audio" checkbox. In general, it's a good idea to keep this system lean and mean and ONLY use this system for doing your CS 402 programming assignments! It's best not to use it for any type of entertainment. Leave the settings for Network the way it is. Just because your host system is using a wireless network, you should NOT setup your virtual machine to use a wireless network (since the network adapter inside a virtual machine is a "virtual" network adapter). Click on Shared Folders on the left and you should see the following screen: A Shared Folder allows your Ubuntu 16.04 to exchanged files with host machine. On the right edge of the screen, there's an icon of a blue folder with a green plus sign on it. Click on it and you should see the following screen: Immediately to the right of "Folder Path", there is an empty drop-down list. You are suppose to select a directory path for the Shared Folder. On a Windows 10 or Mac OS X host, I would now create a folder on the desktop and name the folder, "Shared-ubuntu". Then I would click on the empty drop-down list and get the following screen: Click on "Other" and navigate to the "Shared-ubuntu" folder on the desktop and select it. You should see the following screen (of course, your Folder Path should show different from mime): Please notice that the "Folder Name" is shown to be "Shared-ubuntu". Check the Auto-mount checkbox and type "/Shared-ubuntu" in the text field next to "Mount point" (to mean that this shared folder will appear as "/Shared-ubuntu" inside your Ubuntu 16.04 system). Then click on the OK button to finish setting up the Shared Folder. Your screen should look something like the following: Finally, click on the OK button at the bottom and you are done with setting up the virtual machine. Later, when you start using the shared folder, if something is not working, you may have to make additional adjustments if you haven't done so already. Now you are ready to run your virtual machine for the first time. Step 3: Run Virtual Machine For The First TimeYour screen should now look like what it was at the end of Step 1 (although slightly different since you have changed some settings).To run the virtual machine for the first time, select the Ubuntu 16.04 virtual machine on the left click on the Start green arrow-shaped button (which is to the right of the Settings button). (On Mac OS X, if you get a popup window asking you to allow VirtualBox to change your accessibility settings, just cancel it.) A separate application window will pop up that looks like the following (it may take up to a minute or so before the screen will look like the following, so be patient): You may get messages such as the "Auto capture keyboard" message and the "mouse pointer integration" message like in the above screenshot. To the right of each message, there is blue check mark and a white speech bubble. If you click on the blue check mark, the message box will be closed but you will get the same message over and over again in the future. If you click on the white speech bubble, the the message box will be closed and you will never get this message again. Please click on the white speech bubbles. If you don't see the above screen, please note the problem and go here and try to match what you see with the items there and follow the steps to fix your problem. You may have to delete Ubuntu 16.04 and reinstall it from scratch if you have used a bad setting (i.e., go back to Step 1 or Step 2). If the above window is too small, you can click on the View Menu of the virtual machine window that Ubuntu is running in and look at the very bottom of that menu and select the "virtual screen" that corresponds to your virtual machine and select a suitable scaling percentage there. Please do NOT use the "Scale Factor" in the Display setting screen in VirtualBox. Click on the big Install Ubuntu on the right and you should see the following screen: Please do NOT change the networking setting in the right-top corner of the window! Right now it's showing two arrows, one points up and one points down. This means that you are using a "wired Internet connection". Some people would think that since they are connected to the Internet via a wireless connection, they should change it to a wireless Internet connection. Please do not do that! You are inside a virtual machine. The Internet connection is a virtual/fake connection! Keep it that way so that your virtual machine will automatically use the Internet connection of your host machine indirectly. That's the best way! Check the "Download updates while installing Ubuntu" checkbox and click on the Continue button. (Please do NOT check the "Install third-party software" checkbox because you should keep this virtual machine as lean and mean as possible and use it only to do your programming assignments!) You should see the following screen: Don't change a thing and click on the Install Now button to erase the "virtual disk" inside the virtual machine and install Ubuntu 16.04 into this newly erased "virtual disk". You should see the following screen: Since we are installing Ubuntu 16.04 into a newly erased "virtual disk", it's perfectly okay to proceed. Click on the Continue button and wait a few seconds and you should see the following screen: If your timezone is not "Los Angeles", please click on the map where Los Angeles is and make sure that your timezone is "Los Angeles". If your timezone is not "Los Angeles", some functions may return unexpected results! So, please make sure you set the timezone correctly. Again, this virtual machine should be used only for doing your programming assignments. If you need a different timezone setting for something else, you should do that in a separate virtual machine. Set your timezone to "Los Angeles" and click on the Continue button and you should see the following screen: Select your keyboard. The next thing to do is to click on the Continue button. If you can see the Continue button, just click on it. On some systems, you would see something that looks like the above screenshot where the window is wider than the virtual machine window. You should try dragging the window towards the left until you can see the Continue button and click on the Continue button. If dragging the window failed, you would have no choice but to do the following... Imagine the entire window looks just like the window you just used to set the timezone, i.e., at the bottom and to the right, the first button is a Back button and the 2nd button is a Continue button. Although you cannot see them, they are where they are suppose to be and you can reach them by pressing the <TAB> key on your keyboard. If you press the <TAB> key on your keyboard, you will see that different part of the window gets highlighted. Keep pressing the <TAB> key until you see the Detect Keyboard Layout button highlighted (it will get a thin orange border). Press the <TAB> key one more time and the Back button will be highlighted (even though you may not see the Back button). Press the <TAB> key one more time and the Continue button will be highlighted (again, you cannot see it). Now press the <Space> bar on your keyboard (which will have the same effect as pressing the Continue button) and you should see the following screen: After you have clicked on the Continue button, you should see the following screen: This is a VERY IMPORTANT screen! So, please set it up carefully or you may have to redo everything from scratch. Enter your name in the first textbox and come up with a name for your "virtual" computer (or just keep whatever that was suggested to you). Under username, I would STRONGLY suggest that you use the "local-part" of your USC E-mail address (i.e., your USC e-mail address without the "@usc.edu") AND use the same password for your USC E-mail. This way, you will never forget what they are and this can make your life a lot easier! Please note that this password will also be your "Admin Password". Any time when you are running Ubuntu 16.04 and you are prompted for an "Admin Password", please enter this password. Again, using your USC E-mail password here would mean that you have one less password to memorize. Click on "Log in automatically" (since this is not a real machine) and click on the Continue button. You may be in the same situation as the above where you don't see the Back and Continue buttons and you should do the same thing as above by either dragging the window towards the left until you can see all the buttons, or keep pressing the <TAB> key. After you see the "Encrypt my home folder" highlighted, press the <TAB> key twice and press the <Space> bar on your keyboard to continue. When you continue, Ubuntu 16.04 would start to install itself into the virtual machine and this can take a long time (anywhere from 15 minutes to half an hour, depending on the speed of your machine). When installation is eventually finished, your will see the following screen: Click on the "Restart Now" button to finish the installtion. After a few seconds, you may see the following screen: Click anywhere inside the window (your pointer may disappear and that's perfectly fine) and press <ENTER> and the virtual machine should restart. When the virtual machine finished restarting, Ubuntu 16.04 should be running. If you get a login screen (may be because your screensaver clicked in), please enter your admin password. After you login, you should see the following screen: If you don't have the popup window in the middle of the screen, that's perfectly fine. You will see it at a later time. The rest of what you see is the Ubuntu's Unity Desktop. Let's first talk about this particular popup window. The title of the window says, "Ubuntu 18.04.2 LTS Upgrade Available". This means that if you click on the "Yes, Upgrade Now" button, you will no longer be running Ubuntu 16.04! Therefore, it's VERY IMPORTANT that you click the Don't Upgrade button! (If you see this popup window later, you must do the same thing.) If you click on the "Yes, Upgrade Now" button, you will end up with the wrong system and you will have to delete everything and restart the entire process! For this class, the ONLY system for grading your programming assignments is a 32-bit Ubuntu 16.04 system! If you ask the grader to grade on Ubuntu 18.04, the grader must decline! If you don't see the Ubuntu's Unity Desktop, please note the problem and go to the bottom of this web page and try to match what you see with the items there and follow the steps to fix your problem. You may have to delete Ubuntu 16.04 and reinstall it from scratch. The panel of buttons on the left is known as the "Launcher".
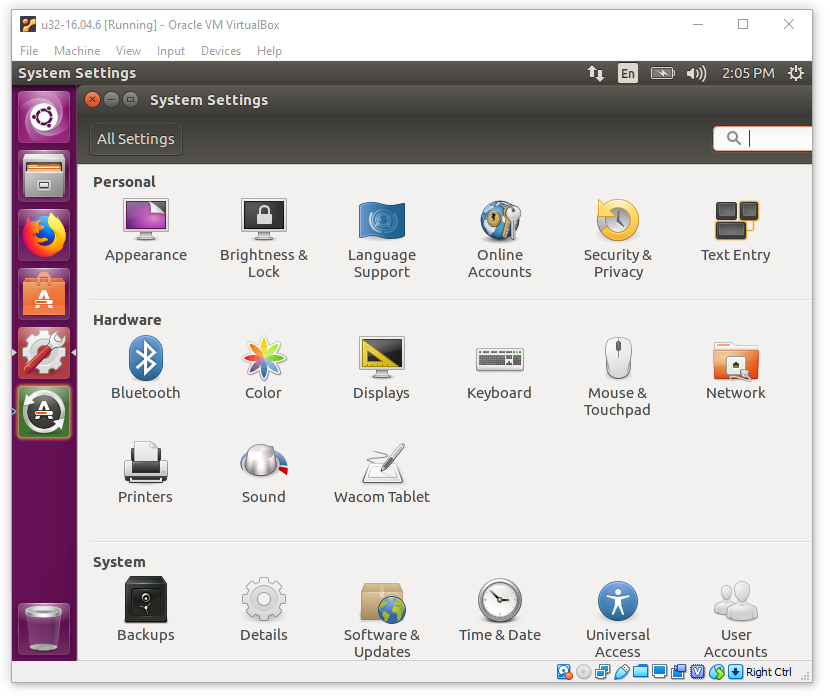
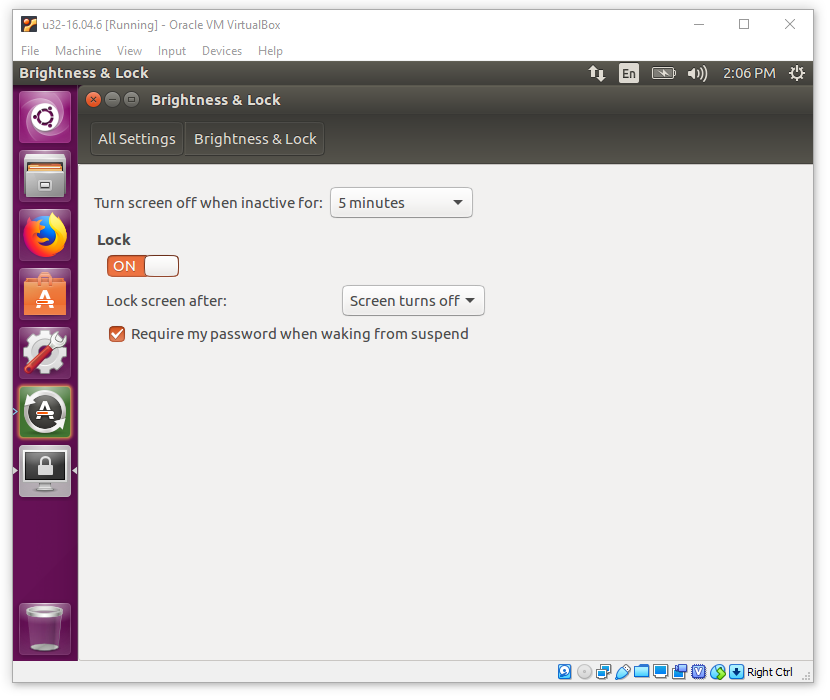
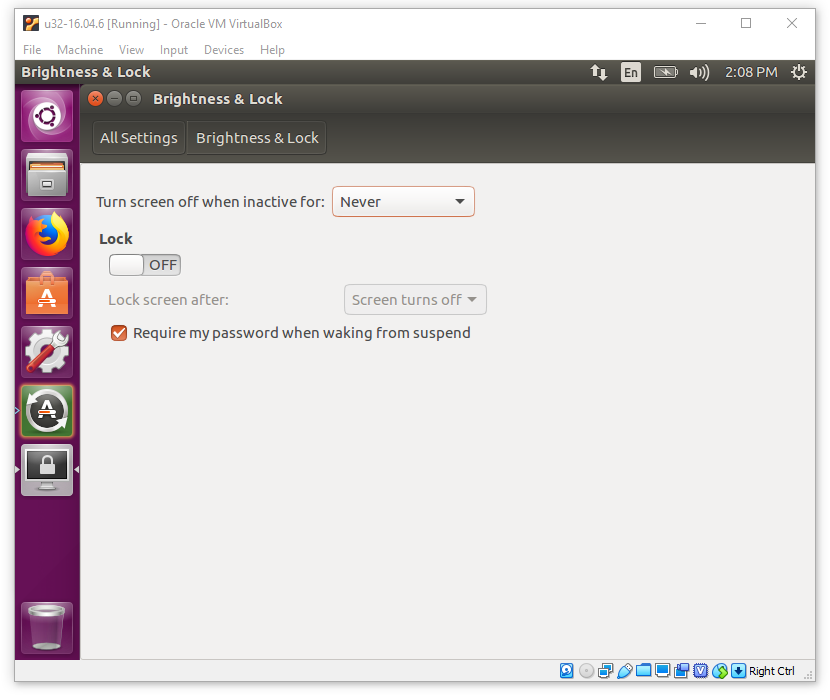
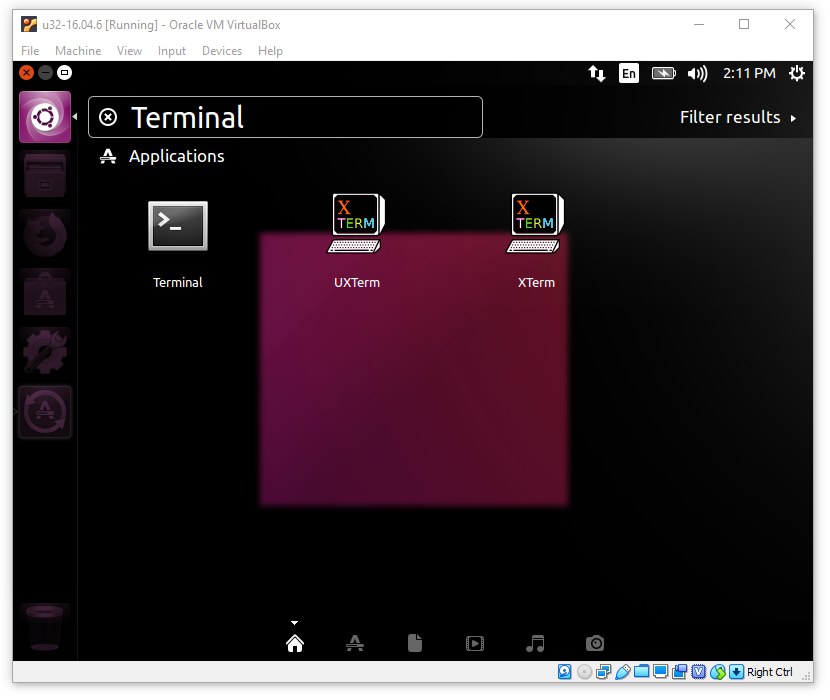
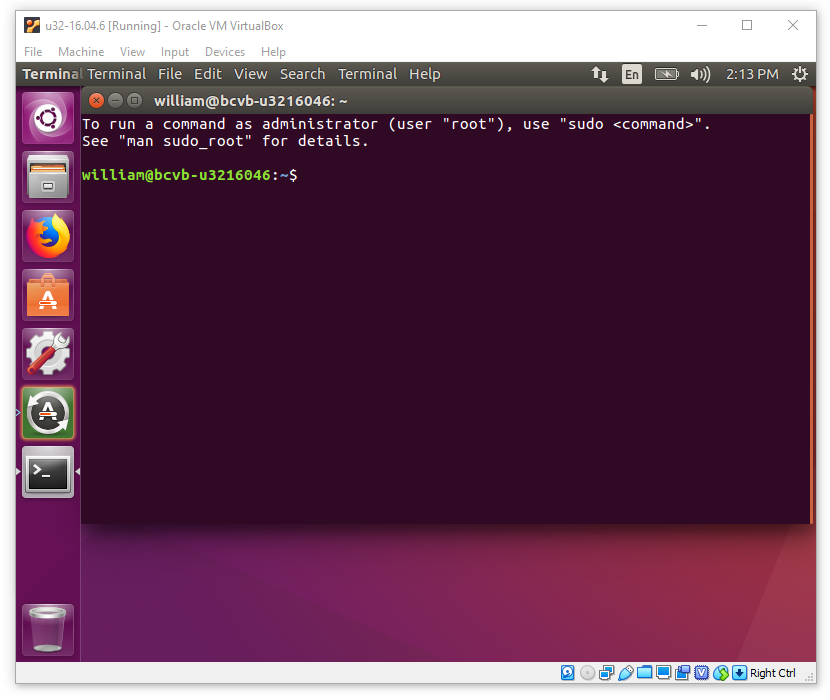
Step 4: Running Ubuntu 16.04 For The First TimeThe first thing you should do is to disable the screen lock so that you don't have to be entering your password all the time. The reason you don't need screen lock is that you are running inside a virtual machine. If your host machnie's laptop/desktop is locked, you don't have to worry about the virtual machine inside. Please click on the Settings icon in the Launcher to setup your desktop. Your screen should look like the following:Click on "Brightness & Lock" and you should see the following screen: Change "5 minutes" to "Never" and click on Lock to turn screen lock off and your screen should look like the following: Click on the orange close box in the left-top corner of the "Brightness & Lock" window to finish up "Settings". The next thing you should do is to add the Terminal program to the Launcher. (The actual name for the Terminal program is the "gnome-terminal".) Move the pointer to the first icon in the Launcher and click on it. Then type "Terminal" and your screen should look like the following: Click on the icon for the Terminal program to run it. Your screen should look like the following: You should keep the Terminal icon in the Launcher so you don't have to search for it over and over again. Right-click on the Terminal icon in the Launcher and select "Lock to Launcher" (on Mac OS X, right-click is <Ctrl+Shift>-click or two-finger-click). Step 5: Switch To Xfce/Xubuntu DesktopThe default "desktop" for Ubuntu 16.04 is the Unity desktop, which works fine on a Windows machine. On Mac OS X, for unknown reasons, the Unity desktop can be extremely slow after Guest Additions are installed! We must have the Guest Additions installed because we want to be able to copy and paste between the host system and Ubuntu, and we want to be able to have Ubuntu go full-screen or stretch to a desirable size.The solution is to use a light-weight desktop. The lightest weight Ubuntu desktop is probably Xfce and that's the one we will use. Please launch a Terminal and type the following to bring the system up-to-date:
    sudo apt-get -y update
    sudo apt-get -y dist-upgrade
    sudo apt-get -y upgrade
This can take several minutes to update the system. When it's done, type the following to install Xfce/Xubuntu desktop:
sudo apt-get install -y xubuntu-desktop
This can several minutes to install.
When it's done, reboot the system and you should end up with the Xfec/Xubuntu deskop that looks like the following:
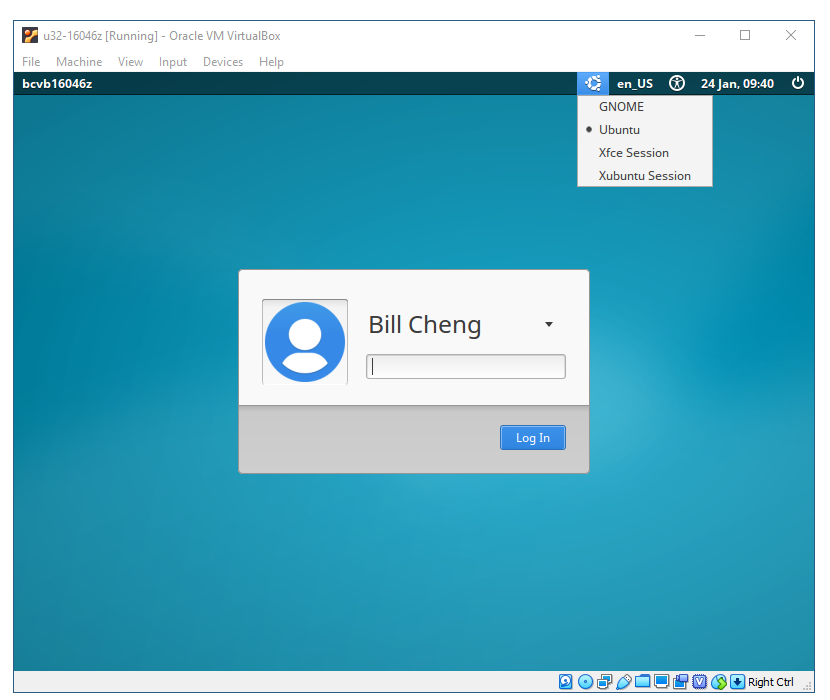
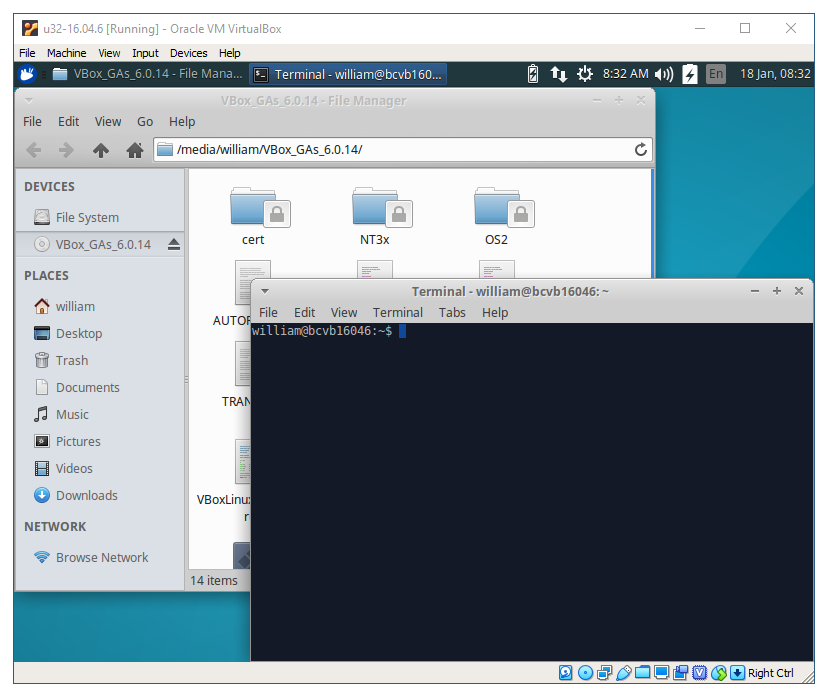
In the above screen, please take a look at the dark-gray toolbar right below the menubar. There is only one button on the left-hand-side. It's the Xubuntu Main Menu. It's blue and it's like the Start button in Windows. On the right, you can see a row of icons/buttons. From left to right, they are battery level, networking connectivity, the power button, calendar button, volume control, another battery level, language/keyboard, and date and time information. If this toolbar is too small, you should run your VirtualBox with higher magnification. If for some reason you are not getting the above screen (i.e., you still get the old Unity deskop), you should click on the Power button in the top right corner and select Log Out. When you get the login screen, look for a Ubuntu icon in the top panel and click on it and it should look something like the following: Click on Xubuntu Session, enter your password, and click on the Log In button. You should get the Xbuntu desktop shown above. If you leave it at GNOME or Ubuntu and if you are running Mac OS X, your system still may be super slow! Step 6: Install Guest AdditionsWithout Gest Additions, your virtual machine window will have a maximum dimension of 800 by 600 pixels and you will not be able to perform copy and paste between your host machine and your virtual machine. Also, your shared folder will not work properly. Therefore, it's very important to have the Guest Additions installed and working.Click on Devices on the menubar above the Xubuntu Desktop and click on "Insert Guest Additions CD Image" and your screen should look like the following: The program need to run is VBoxLinuxAdditions.run and in the above screen, you can see that this file is in /media/william/VBox_GAs_6.0.14 (which is the "CD image directory"). Of course, instead of "william", it should be your login name and instead of "VBox_GAs_6.0.14", it should match your VirtualBox version. But there is no way to run it from this user interface! So, you need to start a Terminal. To do that, you can click on the Xubuntu Main Menu button and then click on Terminal Emulator and your screen should look like the following: In the Terminal, type the following to install the Guest Additions (of course, you should change the directory part to your CD image directory mentioned above).
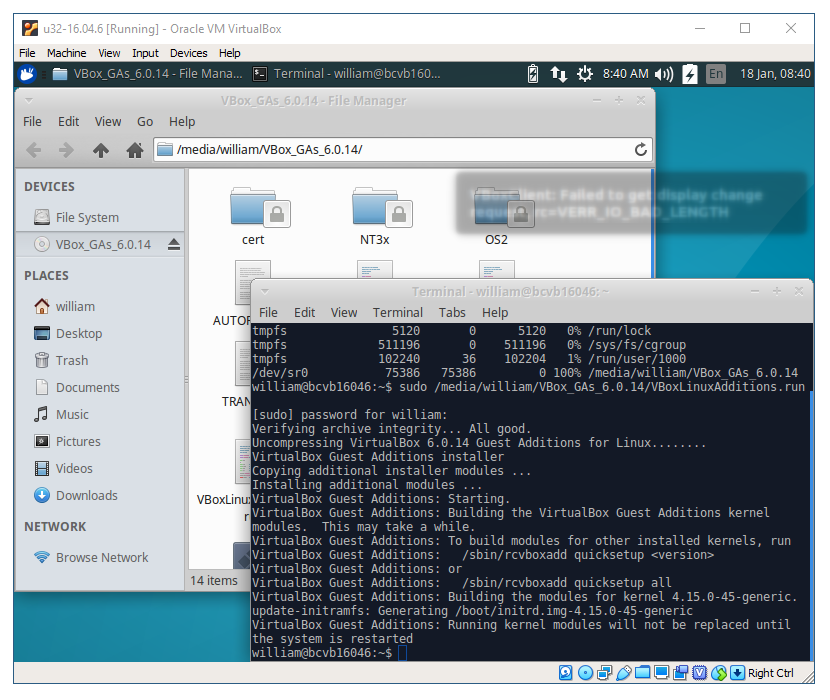
sudo /media/*/VBox_GAs_*/VBoxLinuxAdditions.run
This can take several minutes to finish. When it's done,
your screen should look like the following:
Please notice that in the above screen, the last message in the Terminal says, "Running kernel modules will not be replaced until the system is restarted". Therefore, you need to reboot your system. Please type the following into the above terminal:
    sudo usermod -aG vboxsf ${USER}
    ln -s /Shared-ubuntu ~/Shared-ubuntu
    sudo eject
    sudo sync
    sudo reboot
Please note that if you are installing from the virtual appliance,
the "ln -s /Shared-ubuntu ~/Shared-ubuntu" command above may give you an error about either the file already exists or permissions error, you should just ignore the error.
Also, in order for shared folder to work, Guest Additions must have been installed.
Once your system has rebooted, you should be able to maximize your VirtualBox window so it takes up the entire screen. Also, copying text from a web browser running in your host system and paste the text into an application running in Ubuntu 16.04 should also work. Try highlighting some text in a browser on your host system and press <Ctrl+c> on Windows (or <Cmd+C> on the Mac) to copy the highlighted text into the shared bidirectional clipboard and click inside a Terminal in Ubuntu 16.04 and press <Ctrl+Shift+v> to paste it into the commandline. This should save you a lot of typing and is also less error-prone! If you want to copy and paste in the reverse direction, say to e-mail some text you see in a Terminal to someone else, you can highlight some text in a Terminal, press <Ctrl+Shift+c> to copy the highlighted text into the shared bidirectional clipboard and click on an application running in the host system (such as an e-mail app running in a web browser) and press <Ctrl+v> on Windows (or <Cmd+V> on the Mac) to paste the text into your e-mail app. Your shared folder should also be working. To test out your shared folder, start a Terminal and type the following:
    cd
    cd Shared-ubuntu
    echo "Hello World!" > hello.txt
Then go to your host machine and click open the Shared-ubuntu folder on your desktop and see if you can open the hello.txt file in it.
Step 6: System UpdateTo minimize accidentally upgrading your system to something that's not Ubuntu 16.04, whenever you are offered to upgrade or update your system, just cancel or close the window. If you really want to update your system, just start a Terminal and type the following:
    sudo apt-get -y update
    sudo apt-get -y dist-upgrade
    sudo apt-get -y upgrade
To minimze typing mistakes, the best way to do this is to copy the above 3 lines of text (one line at a time) from your web browser and paste into the Terminal.
When you paste text into the Terminal, the best way is to type <Ctrl+Shift+v> (i.e.,
hold down the <Ctrl> and the <Shift> keys on your keyboard and then press the "v" key.
You will be prompted for your admin password.
The first command above can take a lont time to finish if you haven't updated your system for a while!
Sometimes, it takes so long that you will be
prompted for your admin password again when you run the 3rd command above.
If your host machine is connected to the Internet using the USC Wireless network, it is possible
that your connection may not last for the entire time you are updating your system, especially if you are moving around!
So, it's best that you don't move around. If you lose your Internet connection, you just have to
try the above commads over and over again until you can successfully update your system.
Please note that the above 3 commands contain the word "upgrade". This particular "upgrade" is not to upgrade Ubuntu 16.04 to a different version of Ubuntu, but to "upgrade" only within current distribution. The above 3 commands is the only way you should "upgrade" the system. Please do not "upgrade" your system using any other method! If you unintentionally upgraded your system to something that's not Ubuntu 16.04, you may make your system incompatible with our programming assignments and you will have to delete everything (remember to backup all your work) and reinstall a 32-bit Ubuntu 16.04 system. The "apt-get" is the program for downloading and installing software. But only administrator can install software. Although you are an administrator on your own machine, you do not run at the administrator privilege level by default. The "sudo" command is used to temporarily raise you security privilege to the level of an administrator in order to execute the rest of the command you typed into the commandline. Therefore, when you run the above command, you will be prompted to enter your admin password before the rest of the command can be executed. The good news is that if you run the sudo command subsequently in the same console, you will not be prompted to enter your password, unless your console has been idle for some time. Please note that you can only run one instance of apt-get at a time. Internally, the Software Center also invokes apt-get to download and install software. So, if the Software Center is busy installing a program, you will be blocked from running apt-get until the Software Center is finished. Step 7: Install Software for Kernel AssignmentsYou should also install all the programs that's needed to do your programming assignments now. Please enter the following commands into the Terminal:
    sudo apt-get install -y tcsh vim dos2unix tmux valgrind git gitk git-core openssh-server vnc4server
    sudo apt-get install -y qemu cscope xorriso
Step 8: RebootTo shutdown or reboot the system, please follow these steps.Now you are all setup to use Ubuntu 16.04!
A Linux Shell program runs inside a Terminal program.
By default, your Linux Shell is bash. If you want your login
shell to be tcsh, you can simply type "tcsh" (assuming that you have installed it already).
If you want to change your default login shell, please do the following in a Terminal:
chsh
You will be prompted for your admin password, again. Then enter:
/bin/tcsh
After you have rebooted your system, your terminal will be running the new login shell.
It is imperative that your group uses a version management system.
The software of choice is Git,
originally designed and written by Linus Torvalds.
If you are not familiar with Git, please read the free online book, Pro Git, mentioned in the textbooks section of our course description web page. There are free web sites on the Internet that provide free Git repository service. You should be able to create an account there and share it along your team members. Please make sure that your code is private so that no one other than your team members can see or change the code. Please note that if others (such as the teaching staff) can see your code repository (because it is not private), it will be considered cheating and there are serious consequences. As I have mentioned in the first lecture, you do not have the right to display your assignment-related code in public (even if your prospective employer asks you to). If you display your assignment-related code in public in the middle of the semester, your group will get a zero for the assignment. (If others have cheated off of your code, then your case will be reported to the university and everyone in your group will end up failing the course.) If you display your assignment-related code in public after the semester is over, I will ask the university to change the grades of everyone in your team because you are helping future students cheat. (As I have mentioned in Lecture 1 that USC Student Conduct Code says that you must not knowingly allow other students to cheat from you.) So, please make double sure that your code repositories related to this class are all private. Please do NOT use github.com becuase your private repository automatically turns into a public one if you do not pay them! To start using BitBucket, please visit the relevant part of the projects page.
|