|
If you often experience Internet connectivity problem, you may end up submitting your exams past the submission deadline.
The penalty for late submission is that you will lose 5% for every minute late.
In order not to receive penalty for late submission, you need to provide PROOF to the instructor that
your late submission was the result of Internet connectivity problem by following the procedure mentioned below.
Let's say that an exam must end at 8:40:00am and you have 3 minutes to upload your exam answer text file to the Bistro submission server. You should attempt to make a submission as soon as you can at 8:40:00am (you are not permitted to work on your exam as soon as the clock hits the first second at 8:40:00am). You should reload the exam submission web page and then make a submission. If your submission was successful (i.e., you see the submission ticket displayed in your web browser), then you are done and you don't have to do any of the stuff below! If your submission was not successful, but you were able to reload the exam submission web page and see that the time on the Bistro submission server would change, then you do not have an Internet connectivity problem. Most likely, your submission failed because the submission server is busy because many students are making submissions at the same time. In this case, you should just reload the web page and submit again, and keep repeating these two steps until you either (1) see the submission ticket displayed in your web browser, or (2) your browser failed to reload the exam submission web page because you have lost your Internet connectivity. (Please note that with some browsers, when you reload the exam submission web page, you will have to fill out the web form again.) If you encounter (1), you shold look for file_size, file_name, and server_time_string in the ticket to make sure that they are correct (i.e., you did not submit the wrong file); then you should save the content of the ticket web page into a PDF file for your record (saving a screenshot is really not a good idea; you need to save the entire ticket). If you have a copy of the ticket, you do not need an e-mail as evidence that the submission server has received your submissions. The ticket is all you need. Please understand that an e-mail can take days to get delivered. If you encounter (2), then you are experiencing Internet connectivity problem and you must start Zoom immediately to record all your desktop activities into a video file as PROOF that you have Internet connectivity problem when you are submitting your exam. Please follow the procedure below to create a proper Zoom video file. Please understand that if your Zoom video does not contain all the required information I must apply the late submission penalty mentioned above.
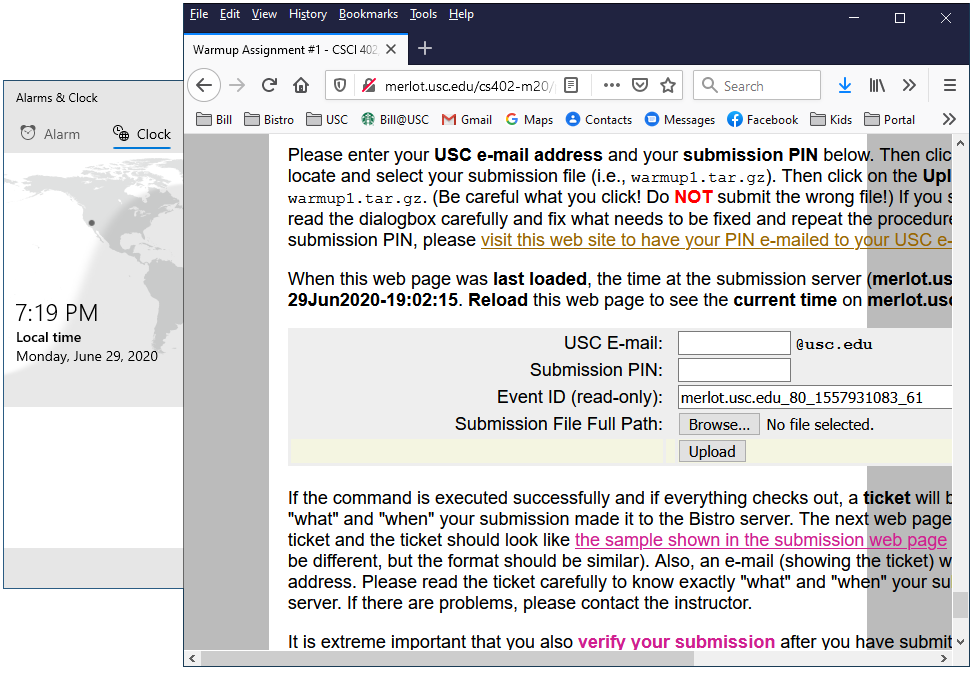
VERY IMPORTANT: Before you start recording your screen, you must make sure the following are setup properly:
Below is what you must do if you have an Internet connectivity problem:
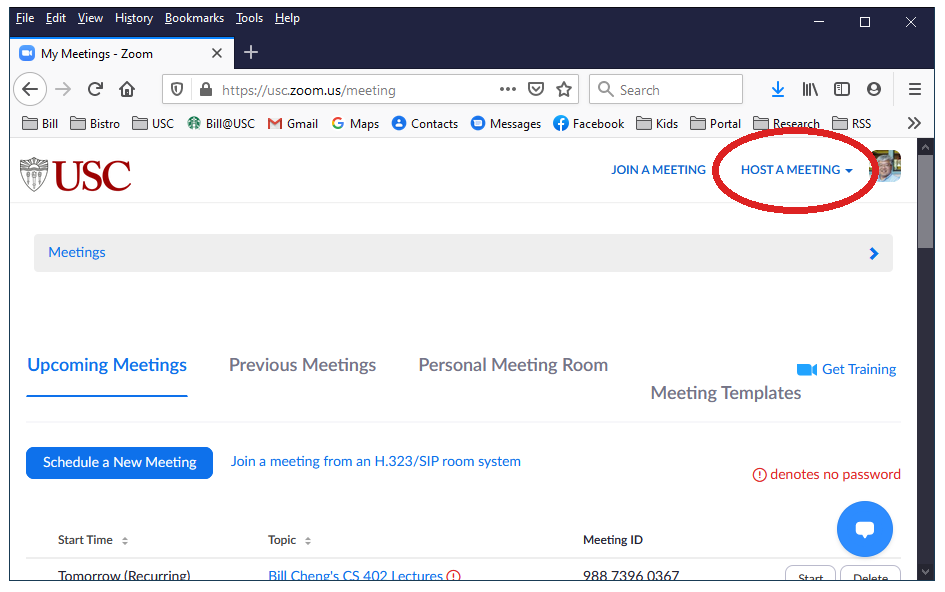
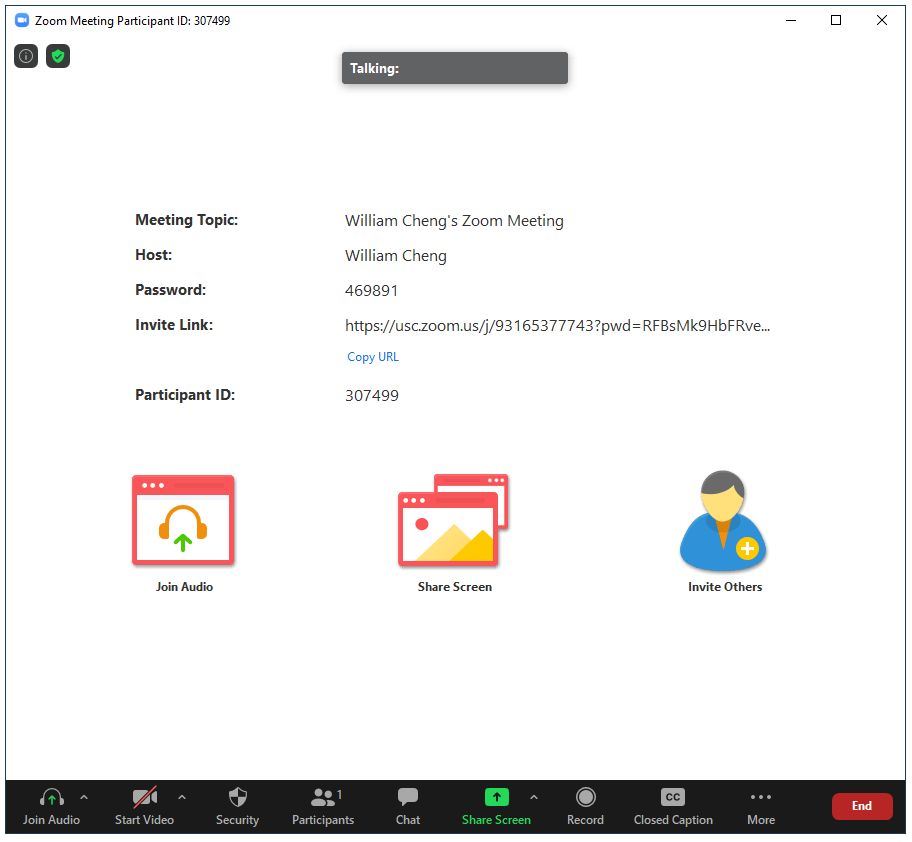
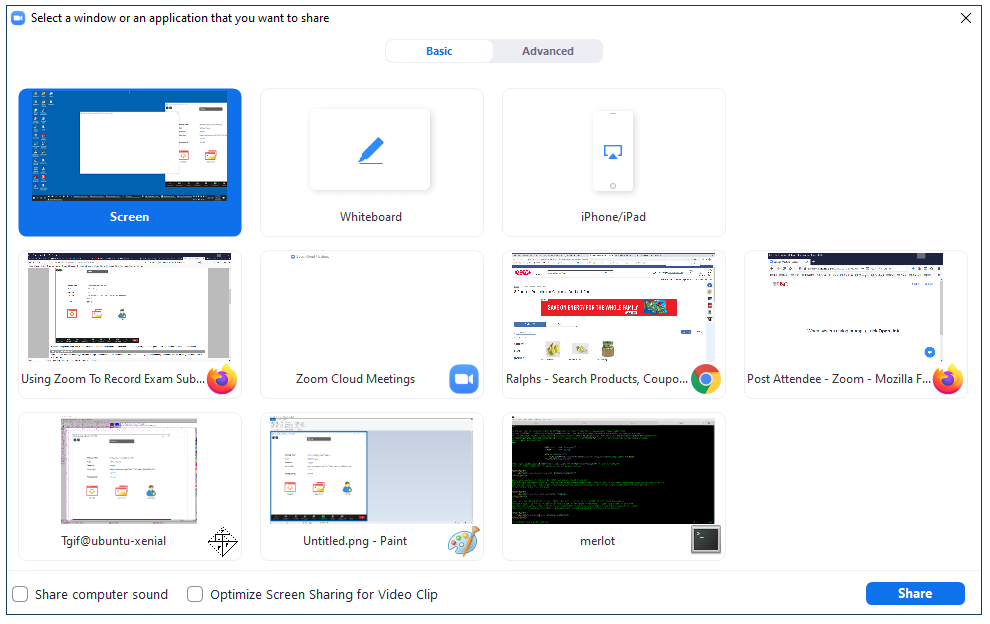
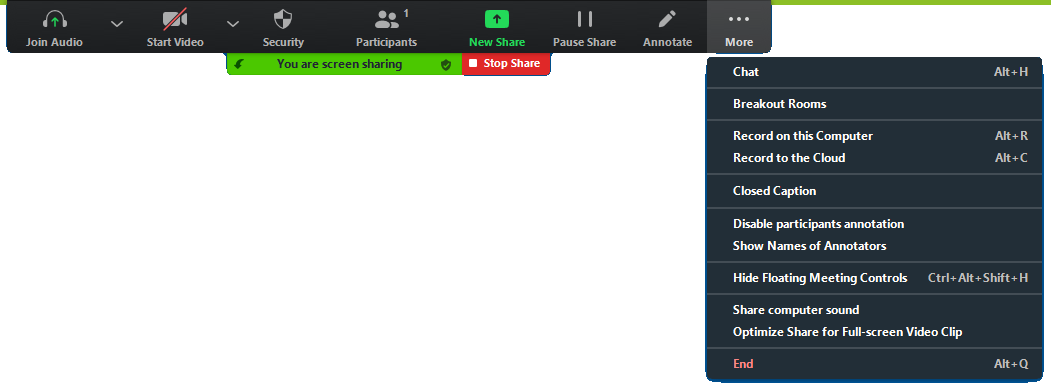
First, you must sign into Zoom with your web browser. Then you should look for "HOST A MEETING" as shown in the screenshot below: Hover your mouse over "HOST A MEETING" and select "With Video Off" (since we only need to record your desktop). You will get two popup windows. The smaller popup window should have "Choose ONE of the audio conference options" in the titlebar and you can just close it. The larger popup window is the main Zoom window. If you move your mouse into the Zoom window, it would look like the following: There are two places where it says "Share Screen". One is in the middle of the above screenshot. The other place is the green button at the bottom of the above screenshot. Click either one of them and you will get a popup window asking you to choose which screen you would like to share with Zoom and it would look like the following (the choices you would get depends on what's running on your machine): In the above screenshot, the selected item is labled "Screen" and it's highlighted with a blue background. If that's not selected in your Zoom, find the item labeled "Screen" and click on it to select it. Then click on the blue Share button in the lower-right corner to share your entire desktop screen with Zoom. The above window will disappear after you clicked the Share button. If you cannot see the window shown below, you should try moving your mouse all the way to the top edge of the screen until the top part of your screen looks like the following (or you can also move your mouse into the green area labeled "You are screen sharing" as shown below): Hover your mouse over the three dots on the right (labeled "More") and you will get a popup menu that looks like the following: Select "Record on this Computer" to start recording your entire screen (clearly, you should not select "Record to the Cloud" if you have an Internet connectivity problem). If you get a popup window warning you that your recording will not include audio, just click on the "Continue Withtou Audio" button. If you get another popup message saying that the meeting audio will not be recorded, just click inside that message and it should go away. Now your Zoom screen recording has begun. VERY IMPORTANT: Now open your exam answer text file with a text editor. Don't maximize your edit editor and move your text editor next to the clock app so that the current time is clearly visible on your desktop. (Your text editor can cover your web browser since your web browser is not very useful right now without a Internet connection!) Scroll to the top of your exam answers text file so Zoom can record your answers. Take a cellphone photo of your answers. Scroll to the next page (or press the Page Down key on your keyboard) so that Zoom can record the next page of your answers. Take another cellphone photo of the 2nd page of your answers. Keep scrolling down this way until you have reached the end of your answers and keep taking cellphone photos. Then close your text editor. Send an e-mail to <bill.cheng@usc.edu> from your cellphone immediately and attach all the cellphone photos of your exam answers and mention that have Internet connectivity problem and now you can relax!
Now go back to your web browser and do the following to show that you have an Internet connectivity problem
(please note that Zoom is recording at this time):
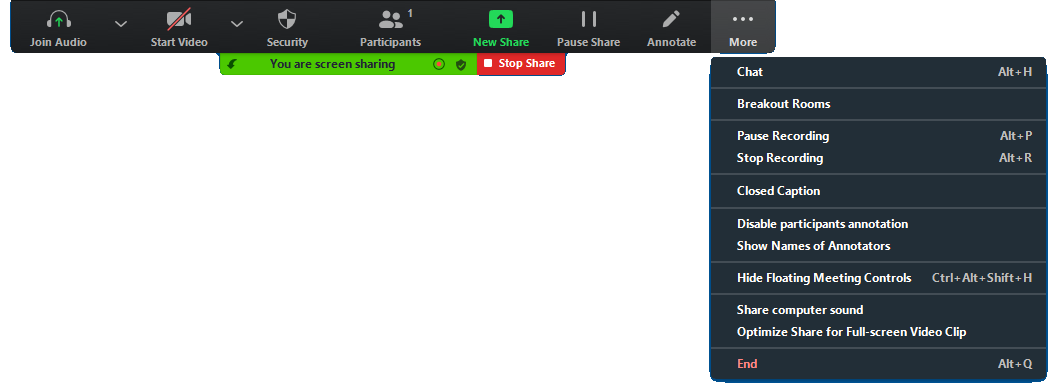
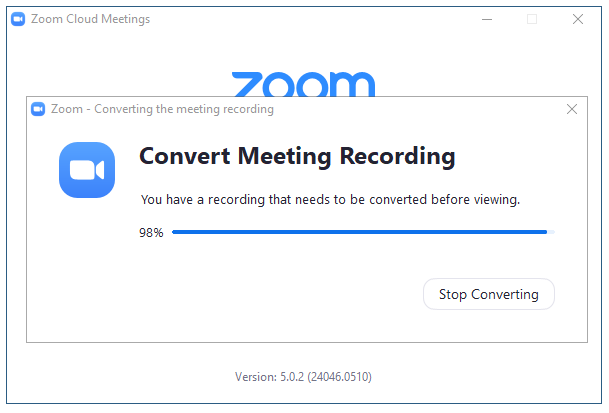
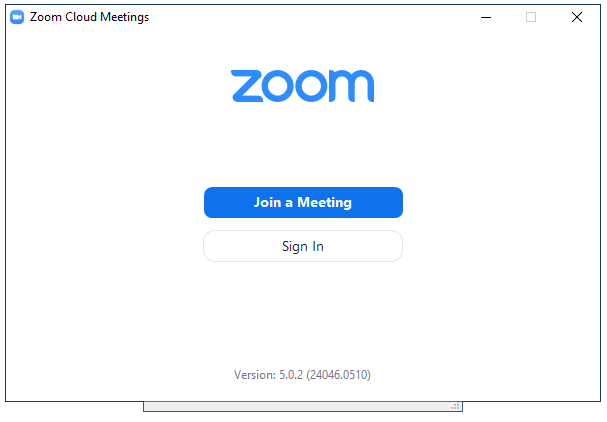
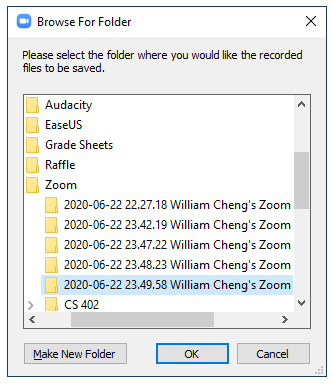
This popup menu is slightly different from the above screenshot since recording is in progress. Instead of having menu choices like "Record on this Computer" and "Record to the Cloud", we now have "Pause Recording" and "Stop Recording". Click on "Stop Recording" to stop the screen recording. Then click within the white square box in the red "Stop Share" button and you will get back to the main Zoom screen that you started with. Click on the red "End" button in the lower-right corner to end Zoom. You will get a popup window with a red "End Meeting for All" button in it. Click on the "End Metting for All" button to finally end Zoom. VERY IMPORTANT FOR MAC USERS: On a Mac, if this is the first time you are doing a Zoom recording, you will get a popup window asking you to give permissions to Zoom to write to the disk. You must setup permissions now when you are practicing Zoom recording! Just click through the popup windows to allow Zoom to save files into the Documents folder. Next time when you record with Zoom, it should not ask you again since you have already given permissions. This is why you need to practicket Zoom recording now and not wait until exam time! Your screen will look like the following when Zoom is converting the recording into an MP4 video file: The top window will disappear all by itself when the conversion is done and your screen may look like the following: You can see that there are actually two windows, one on top of another (the relative positions of these windows may be different for you)! Close the window that says "Zoom Cloud Meetings" in the titlebar since we are done with the recording and you should see the other window which may look like the following (it will look different on a Mac): The above popup window is showing your where Zoom will save the MP4 video file. Look at your screen very carefully to see exactly where the MP4 video file will be saved and then click on the OK button to save the MP4 video file there. If your submission timestamps in the ticket is after 8:43:00am, you need to get ready to send the MP4 video file to me to prove to me that you have Internet connectivity problem when you are submitting your exam. (On the other hand, if your submission timestamp in the ticket is before the first second in 8:43:00am, you can delete the MP4 video.) Finally, even if your submission timestamps is after 8:43:00am, unless you are contacted by the instructor, please do NOT submit your Zoom video or send your Zoom video anywhere. Your video file may be too large to be sent over e-mail and you need to discuss it with the instructor to figure out what needs to be done. Just make sure you don't delete it accidentally.
|
